
With Moesif, each user interaction on the front-end application and API can be logged and reported upon. This is especially true when you use a powerful tool like Segment to track front-end events and send them to Moesif. The result is observability that looks at every aspect of the user journey, allowing you to diagnose issues within your onboarding and conversion flows and what to double down on. Combining Moesif and Segment gives an unparalleled look at your user’s journey. Let’s look at how to integrate Segment with Moesif and build some reports to track your user's onboarding and conversion journeys.
Step 1: Configure The Segment Source Integration
A common way to use Moesif and Segment together is to track front-end events. By doing so, you can see the user's entire journey from page visit to log-in through to the API calls that they are making.
You must add your web application as a Segment Source to track front-end events sent through the Segment Track method. You can do this by following the instructions here.
Step 2: Add Moesif as a Segment Destination
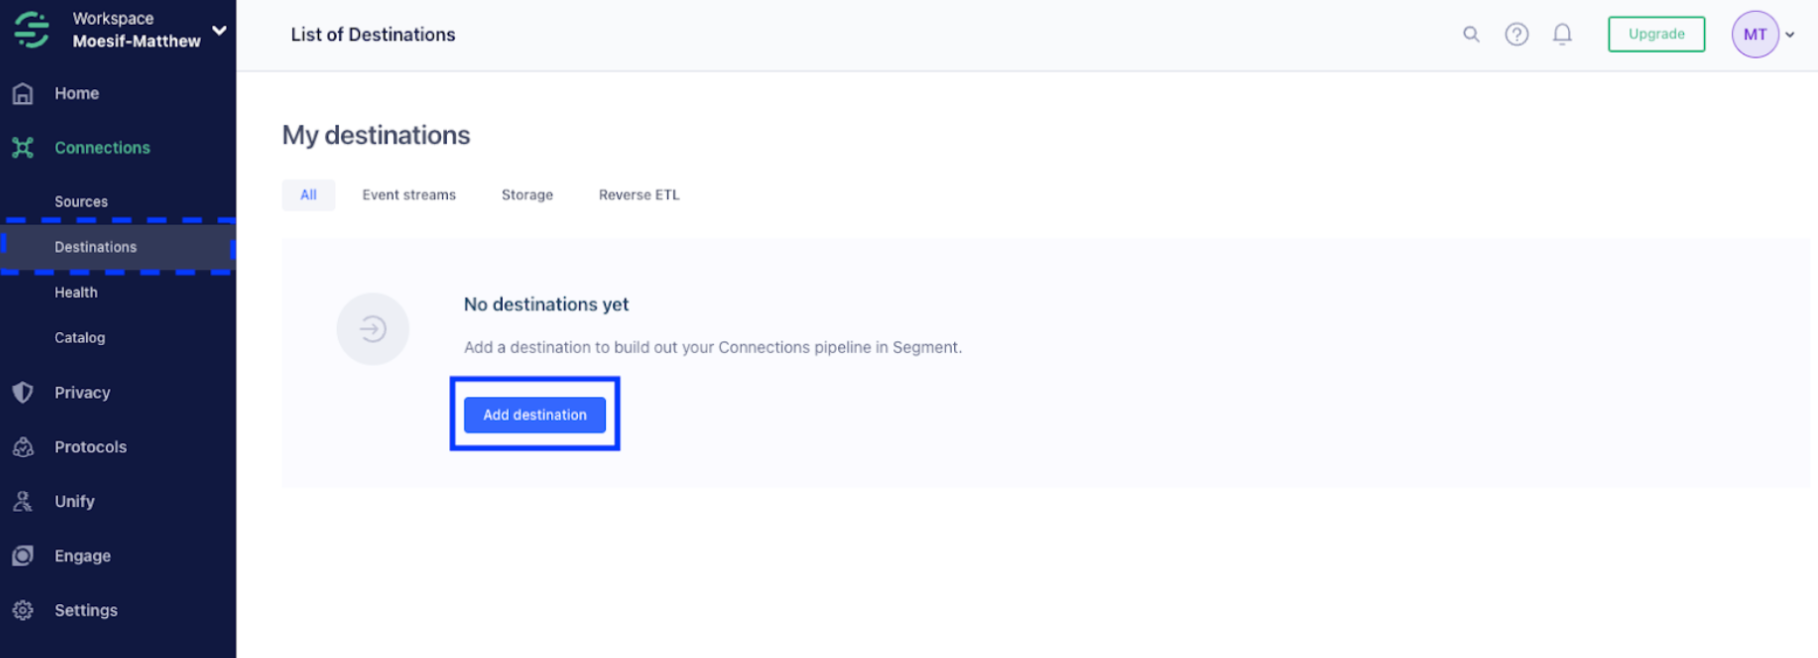
In Segment, go to the Destinations screen and click the Add destination button.
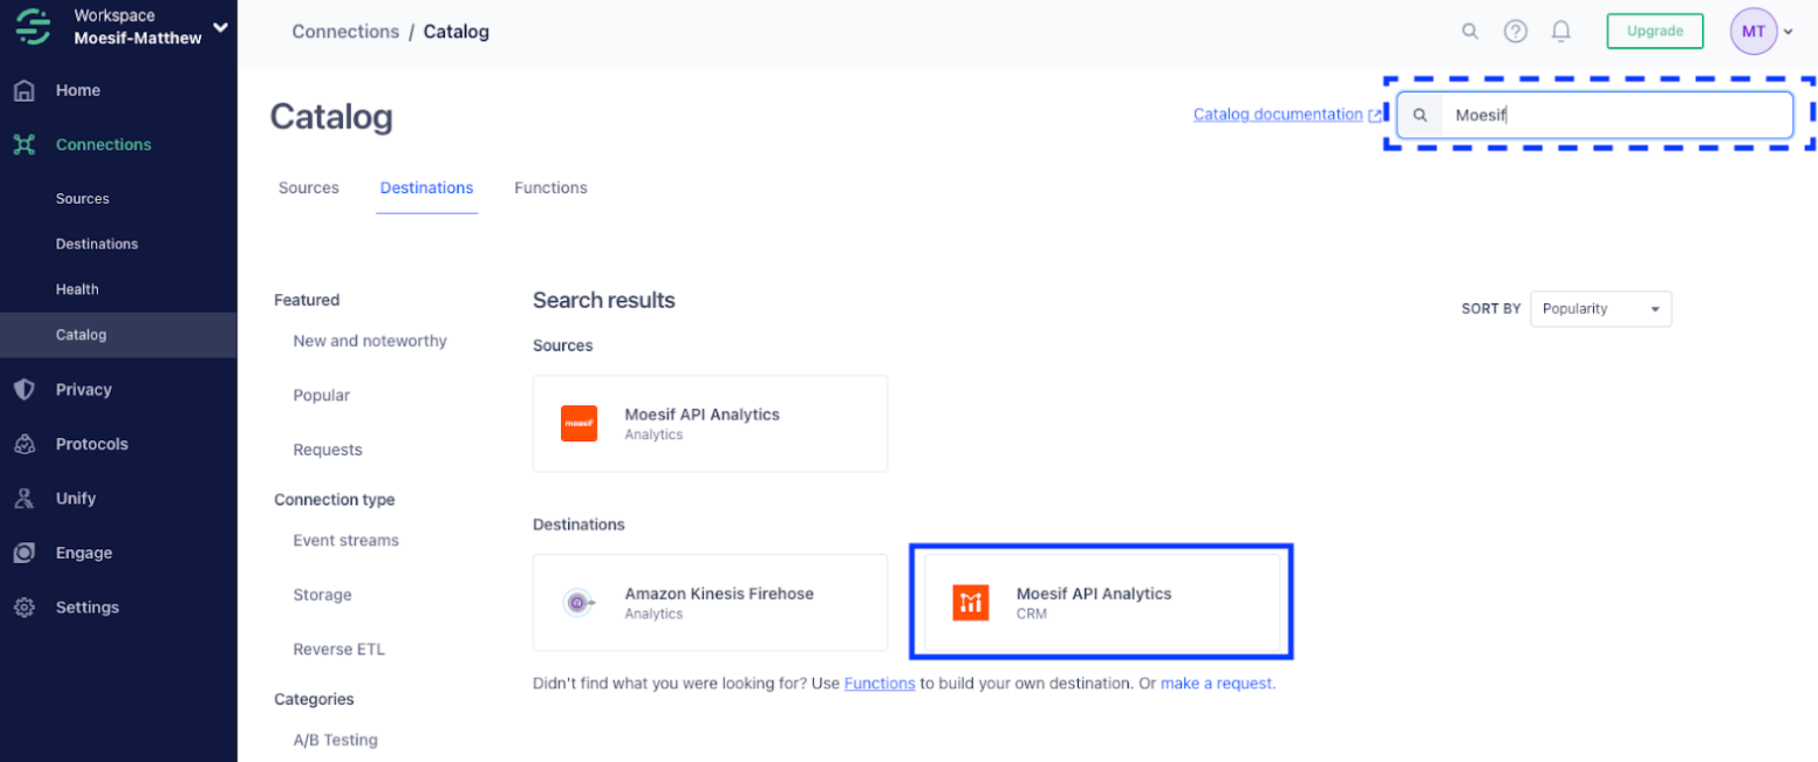
Then, in the Catalog, search for “Moesif.” In the results, under Destinations, click on Moesif API Analytics.
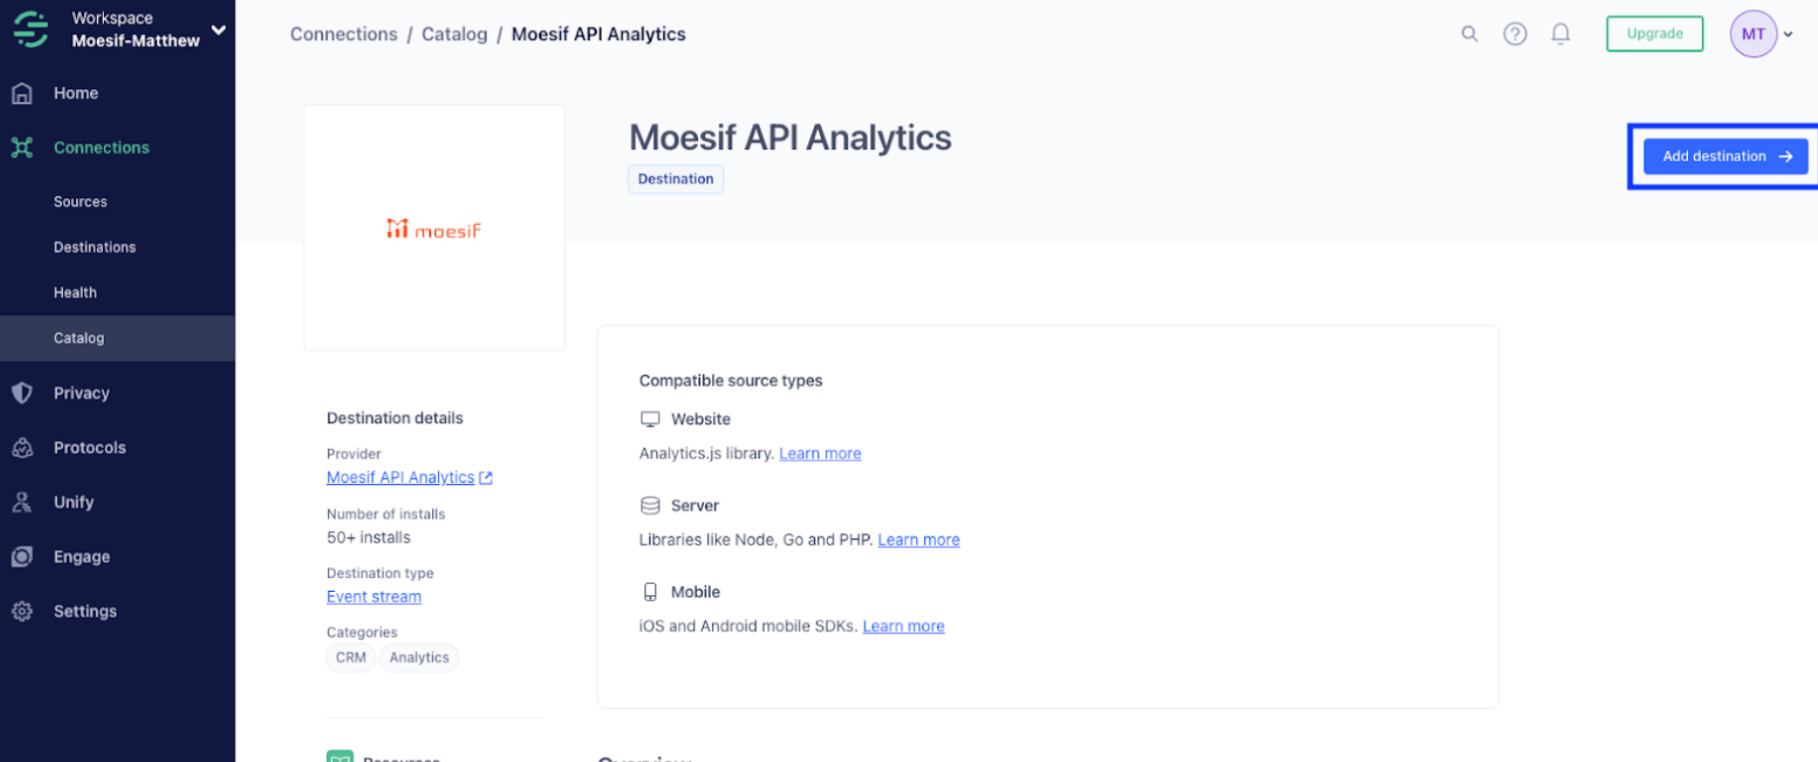
On the Moesif API Analytics catalog page, click the Add destination button in the top right corner.
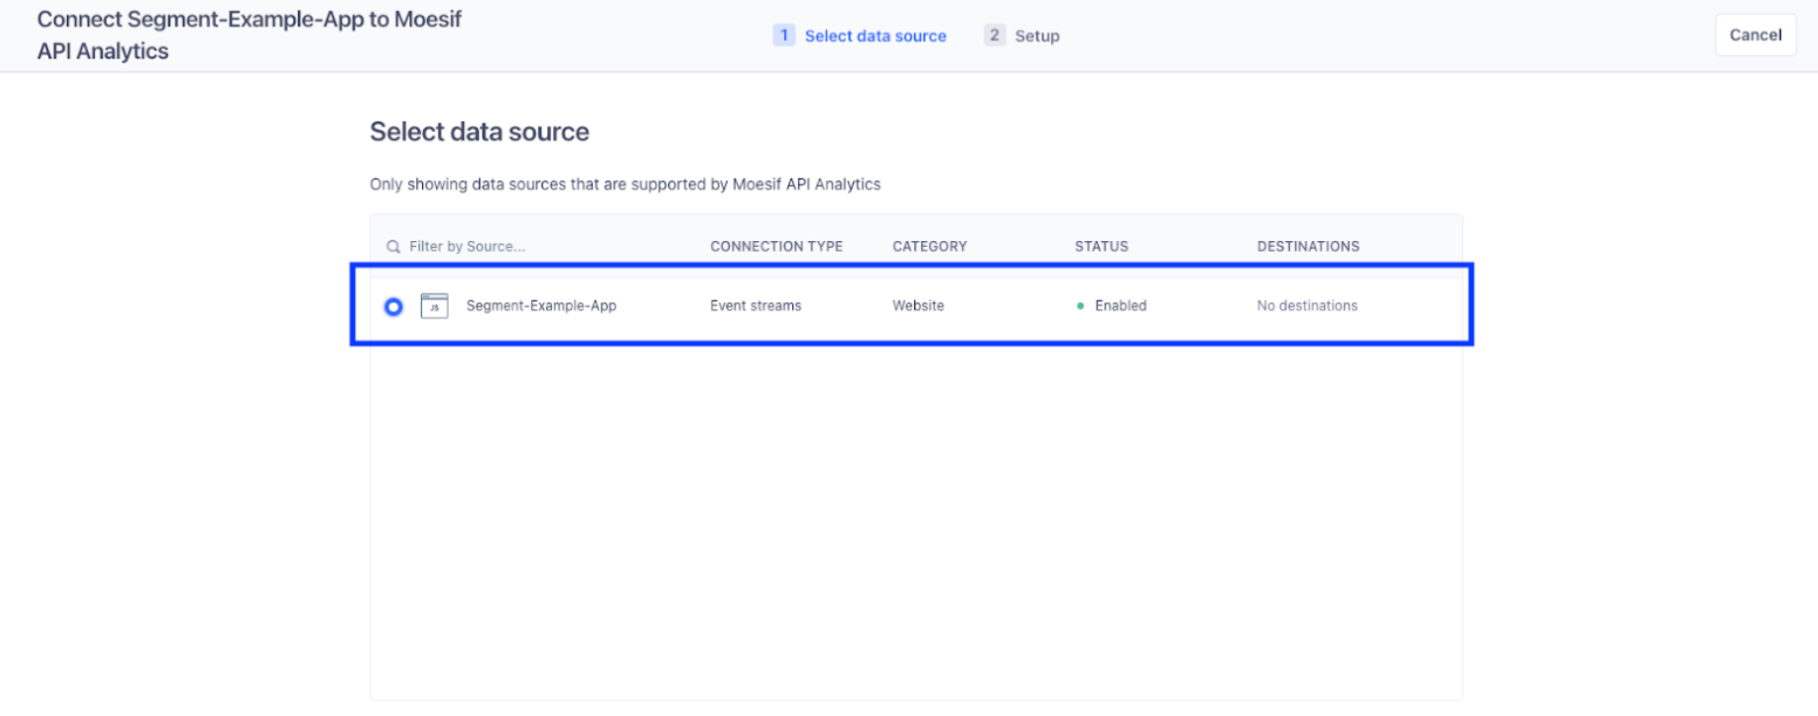
On the Select data source screen, choose the data source you’d like to use to push events to Moesif. In this example, we have chosen a Website(JavaScript) source. Once selected, click Next in the bottom right corner of the screen.
Next, we will need to give a name to our destination. For simplicity, we can just name it “Moesif Prod.” Of course, if you have different Moesif environments you may choose to name this something different. Once you’ve named the destination, click Create destination in the bottom right.
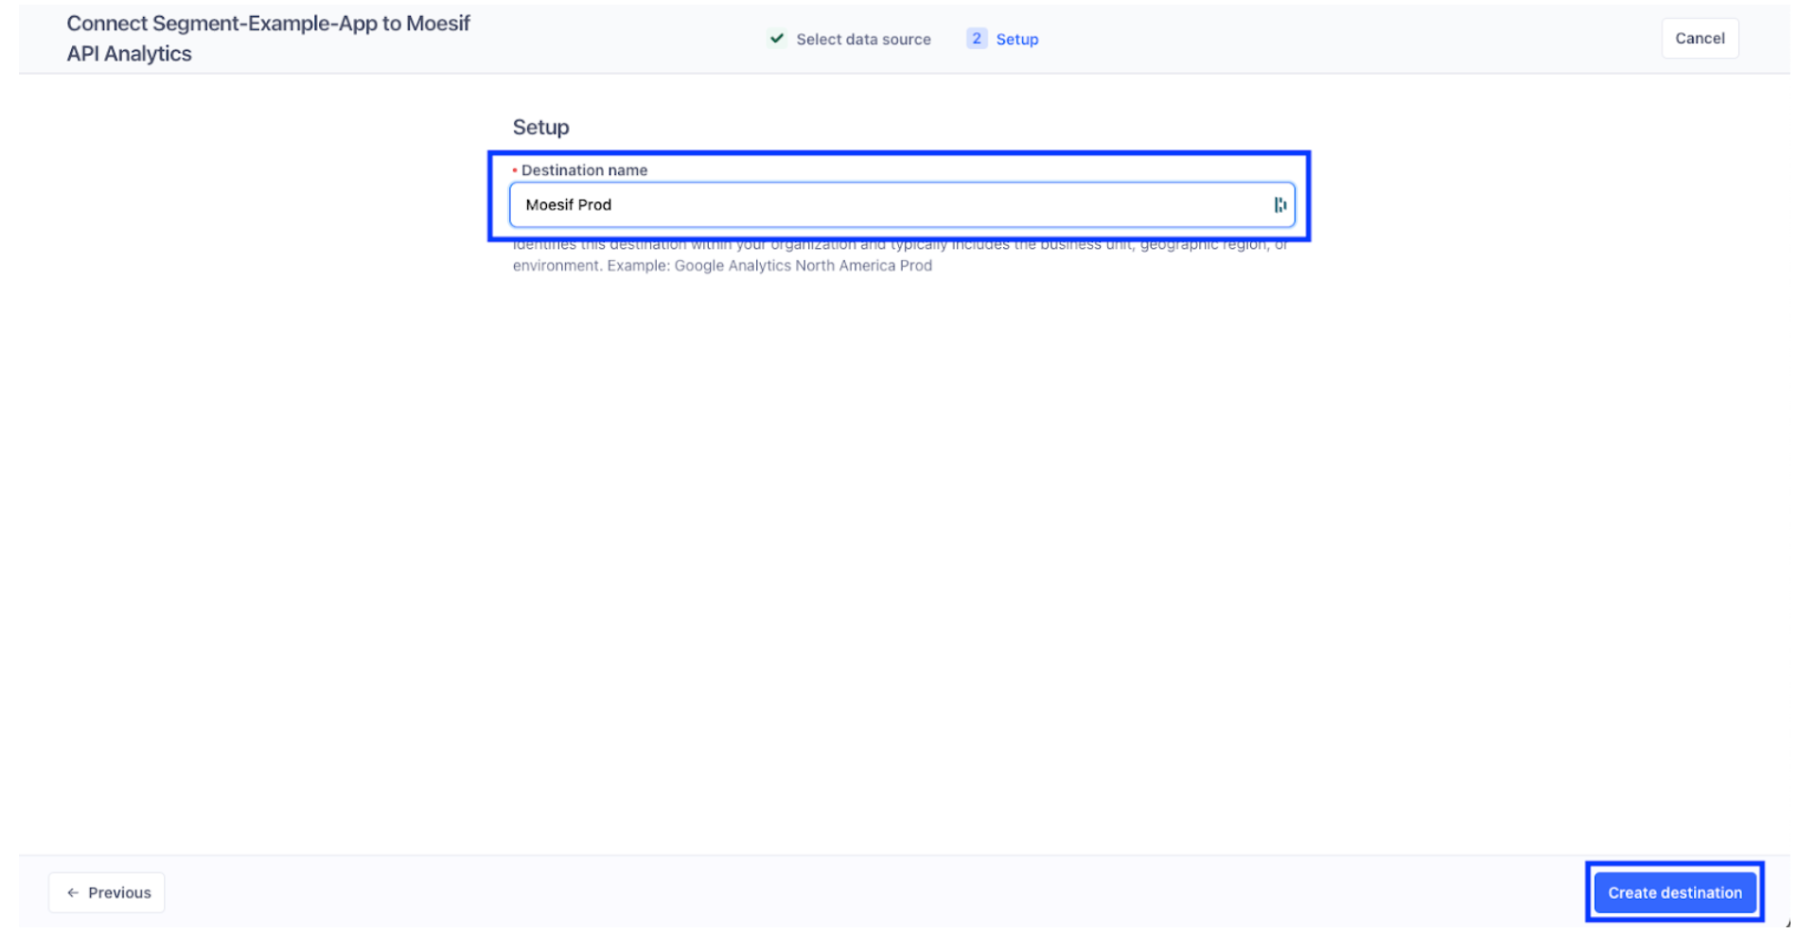
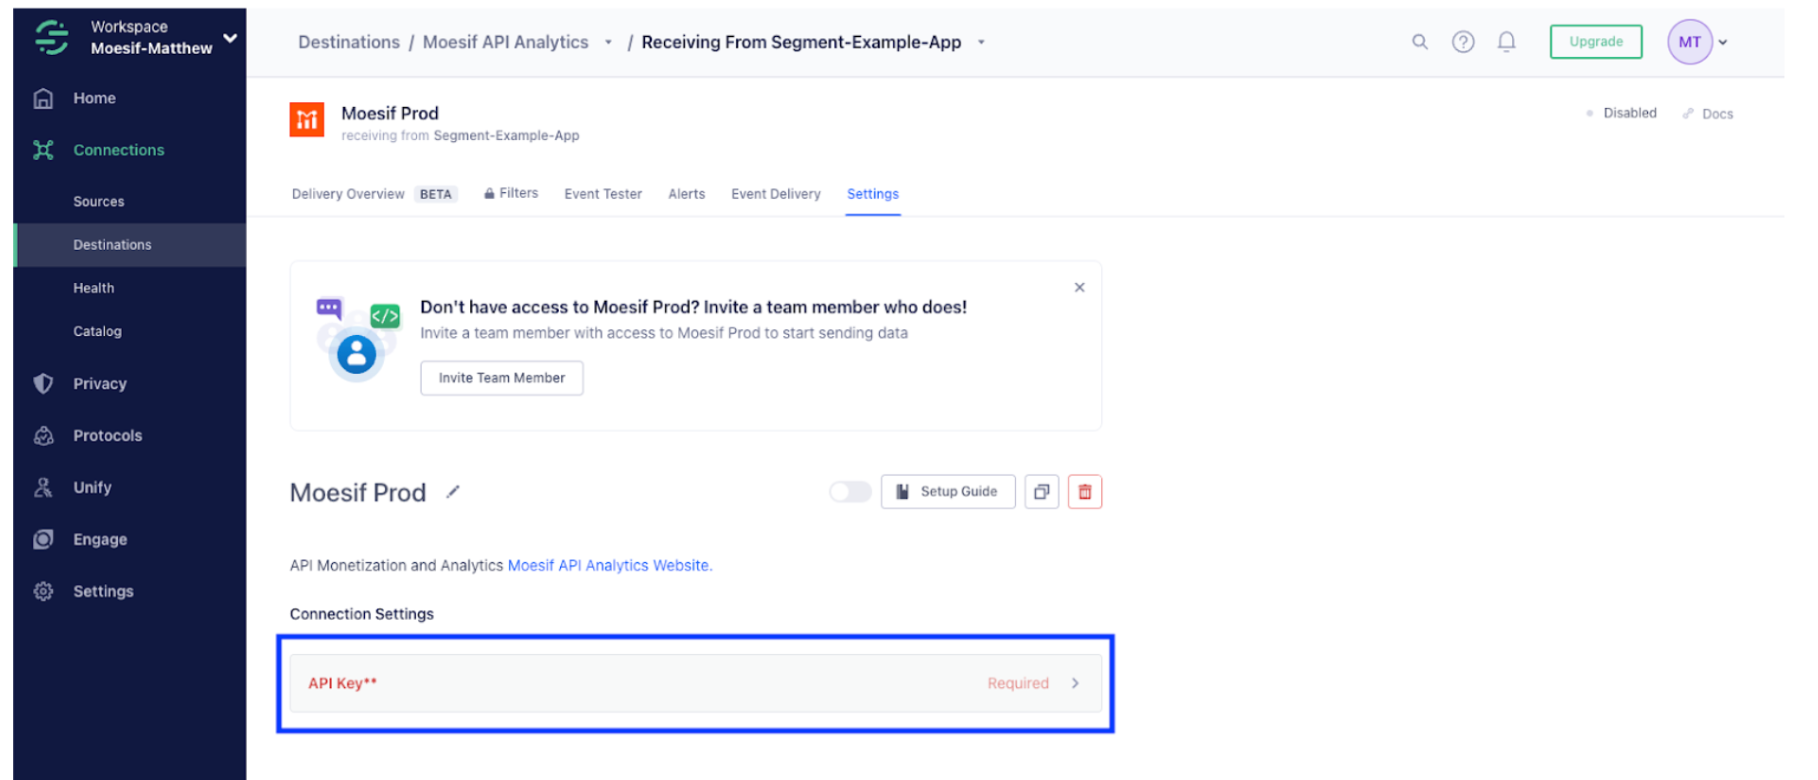
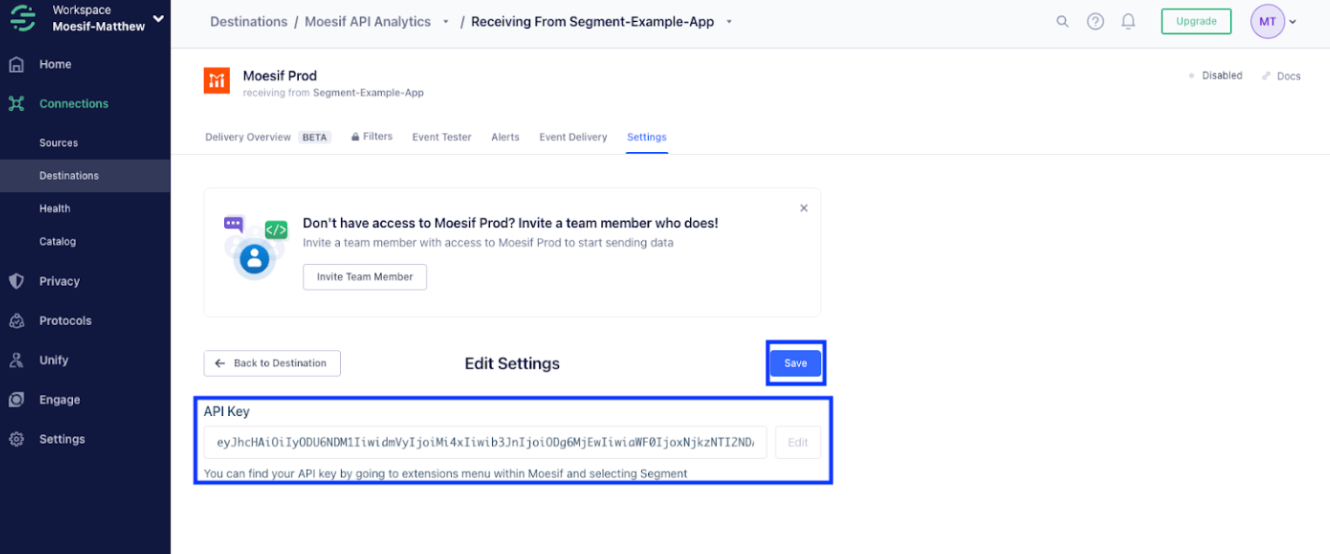
After this, our Moesif destination has been created. The last step is to add the Moesif Application ID into the API Key field under Connection Settings. To add the key, click on the setting. Then click the Edit button at the end of the input.
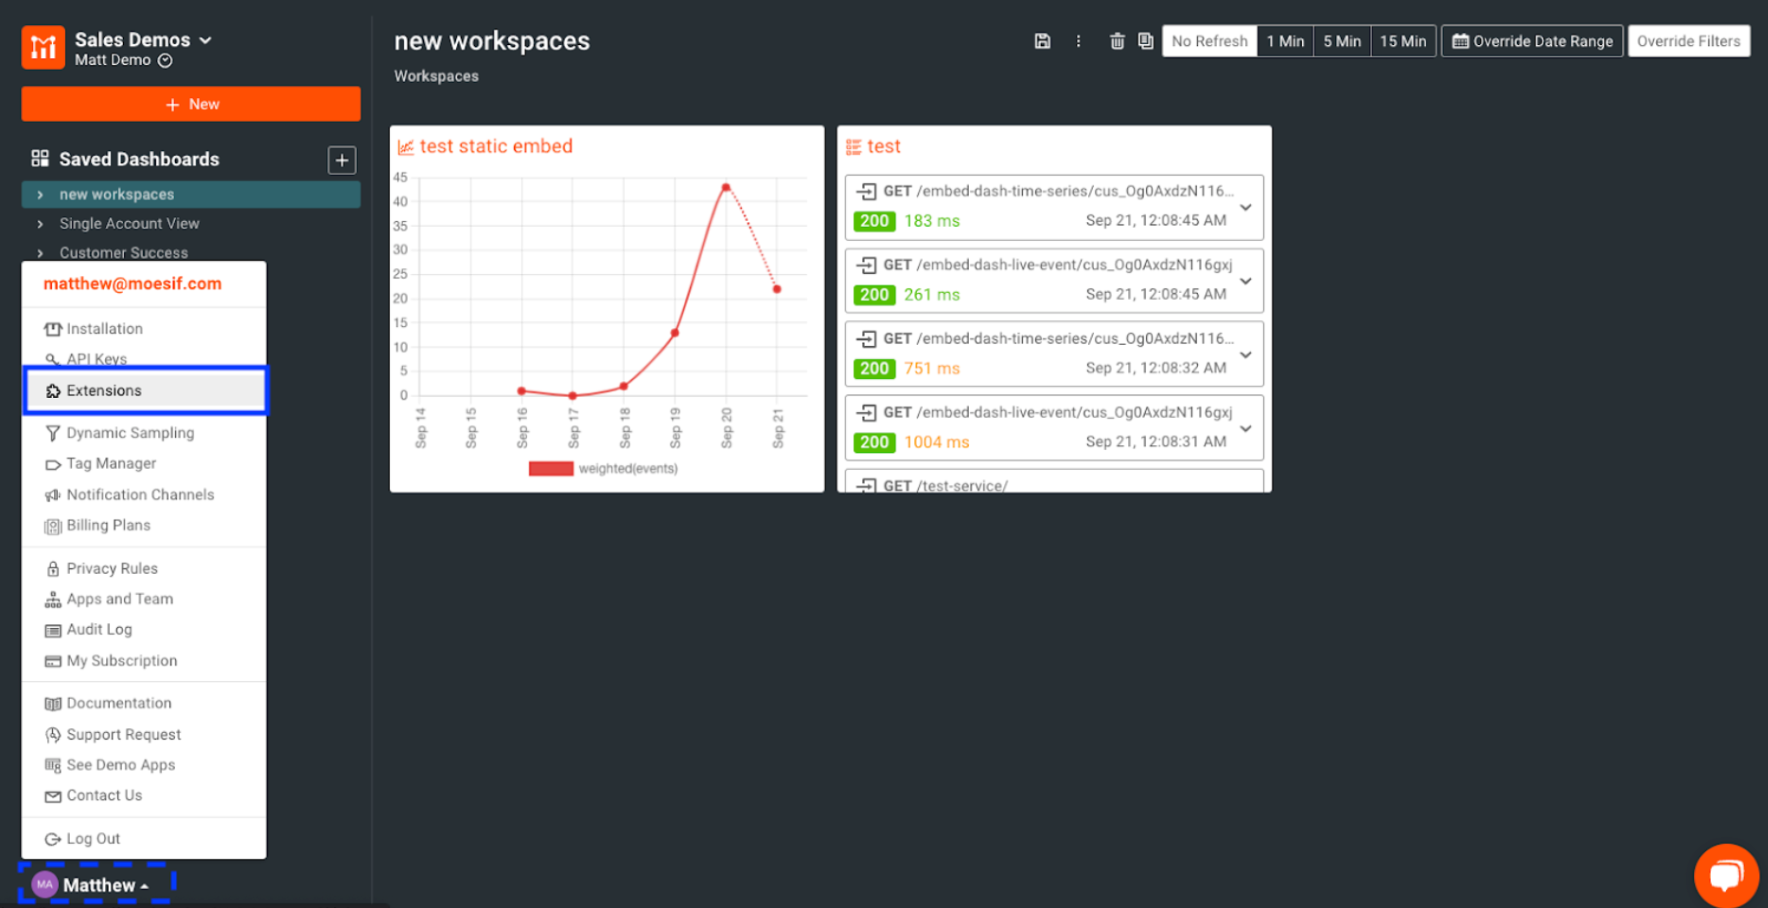
In another browser tab, log into Moesif. Once logged in, click the Settings button in the bottom left of the screen (displayed as your name and image). In Settings, select Extensions.
Next, search for the Segment extension in the search bar on the Extensions screen. Once the Segment extension tile is displayed, click Install or Configure (depending on if you already have the extension enabled).
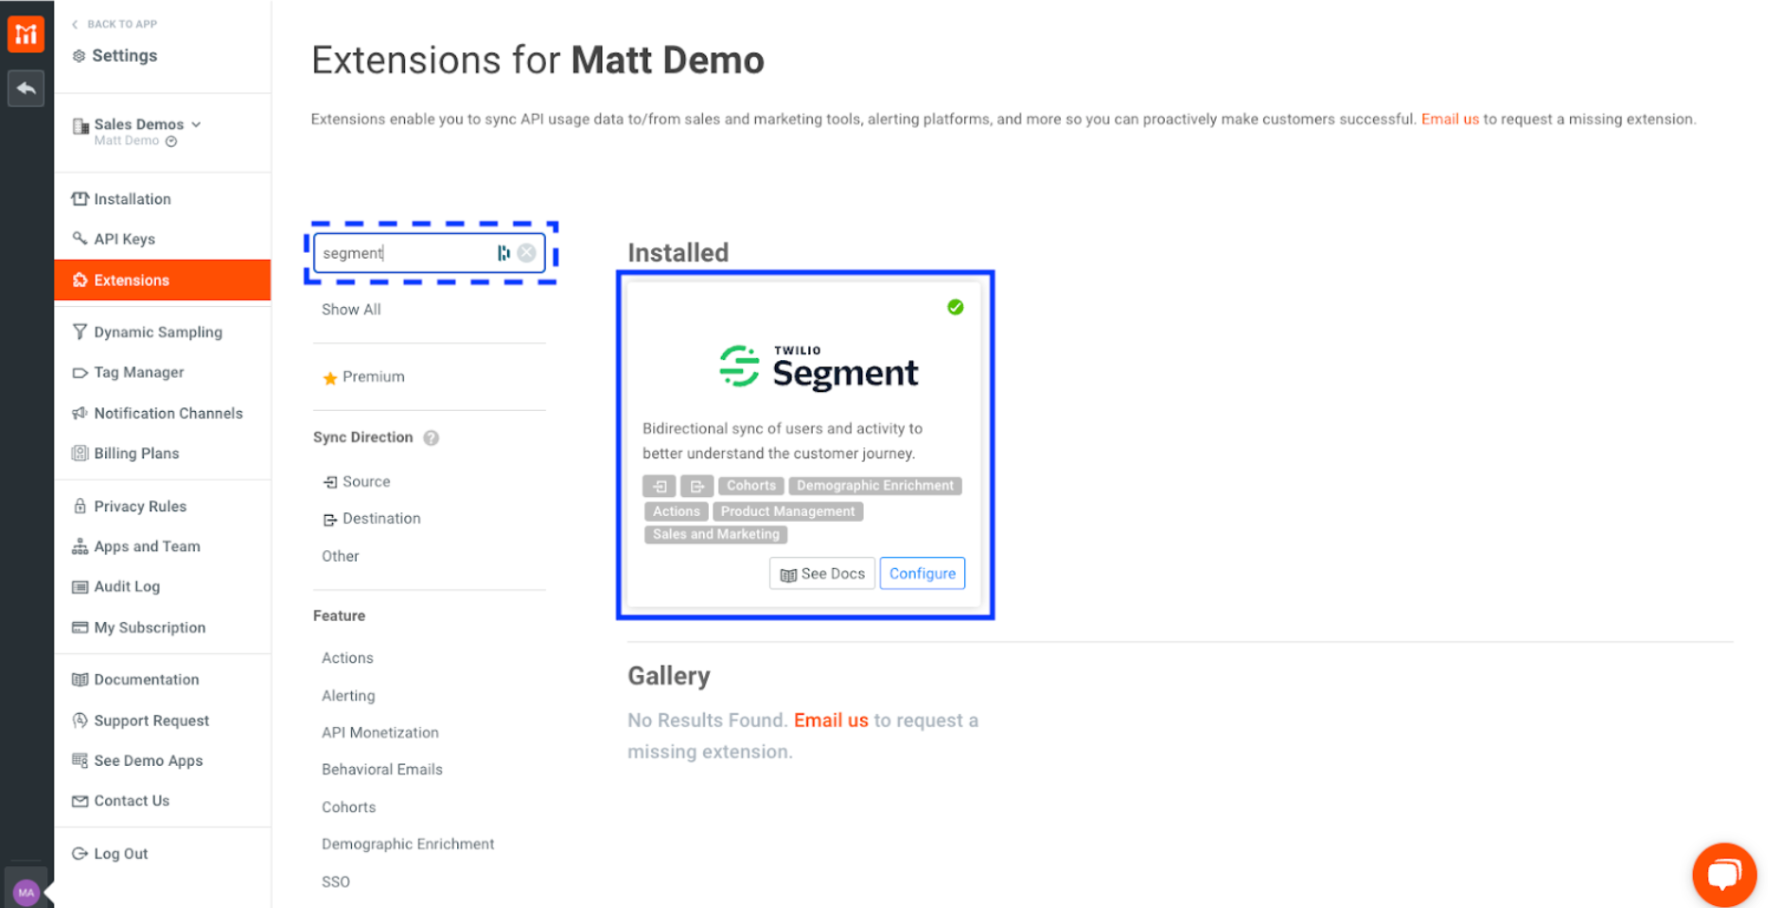
Copy the value under Your Collector Application Id for {Your App} in the Segment Integration modal that appears.
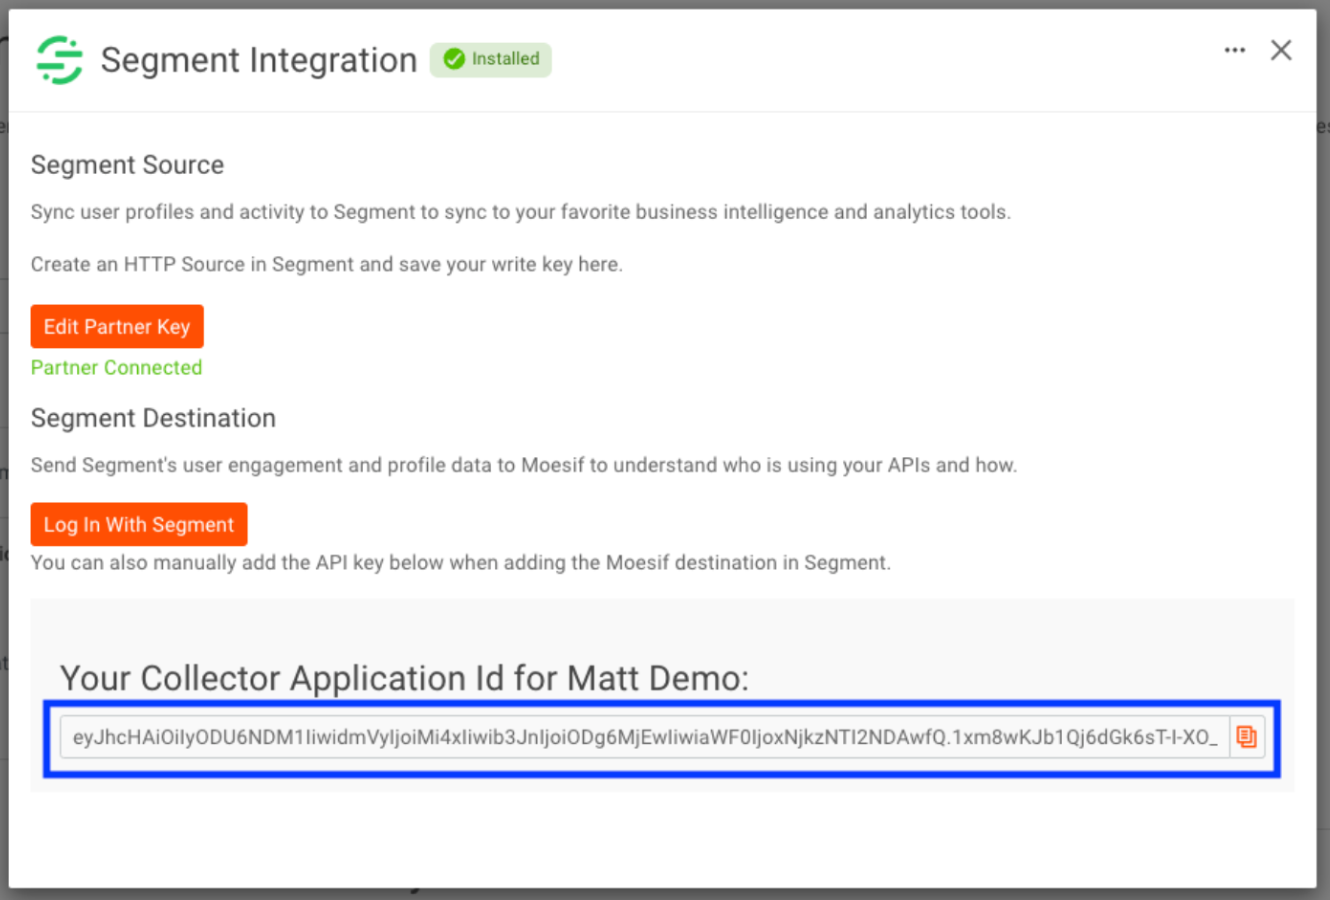
Take the value you just copied and paste it into the API Key field in the Moesif configuration in Segment and click Save.
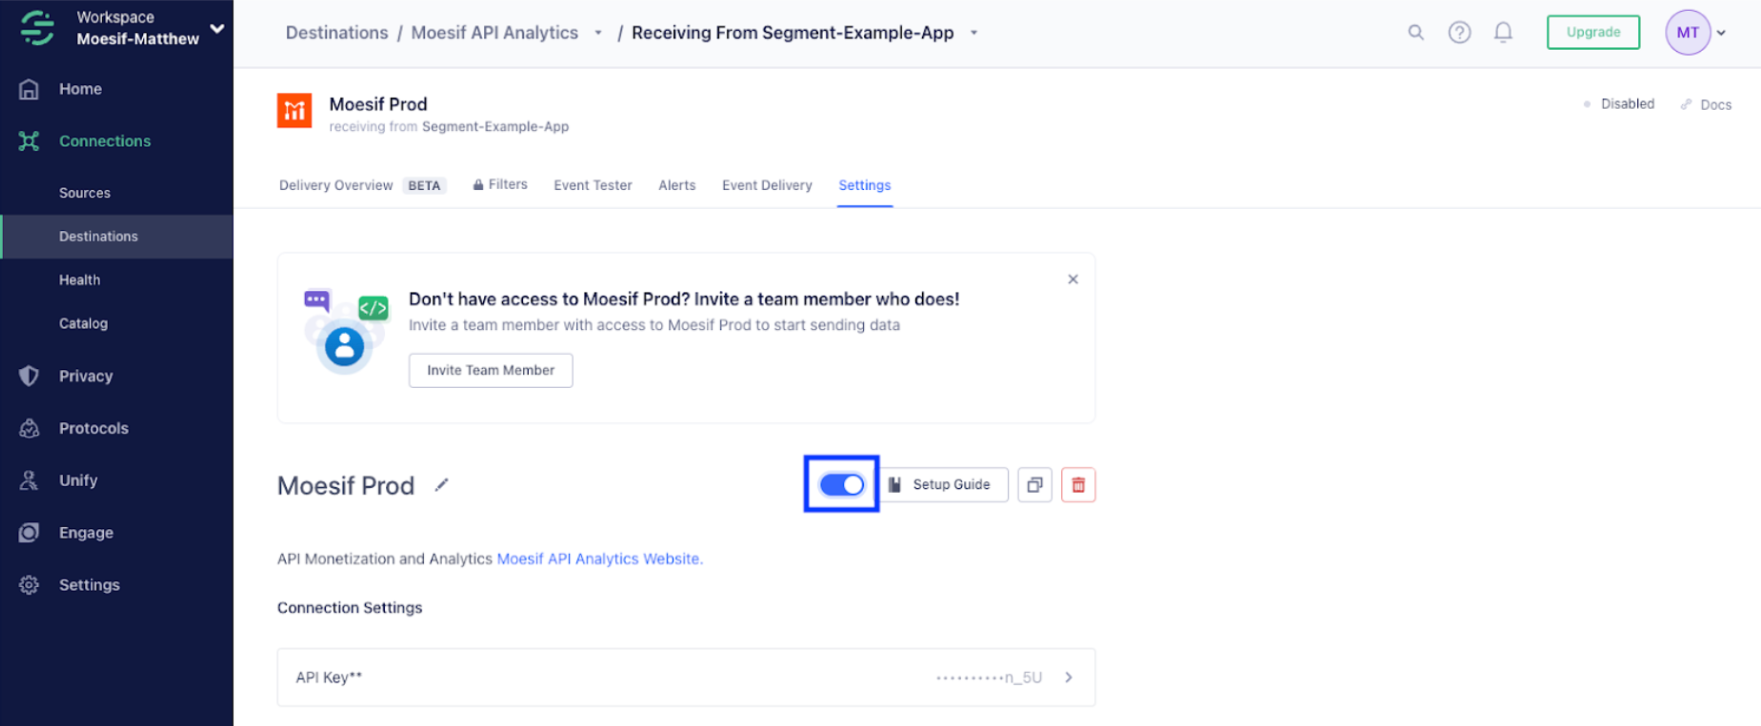
Lastly, make sure that the Destination is enabled by turning the toggle to ON.
With that, we can get some events flowing into Segment through our web app (or other source) and they will be picked up in Moesif.
Step 3: Confirm Events Are Being Received in Moesif
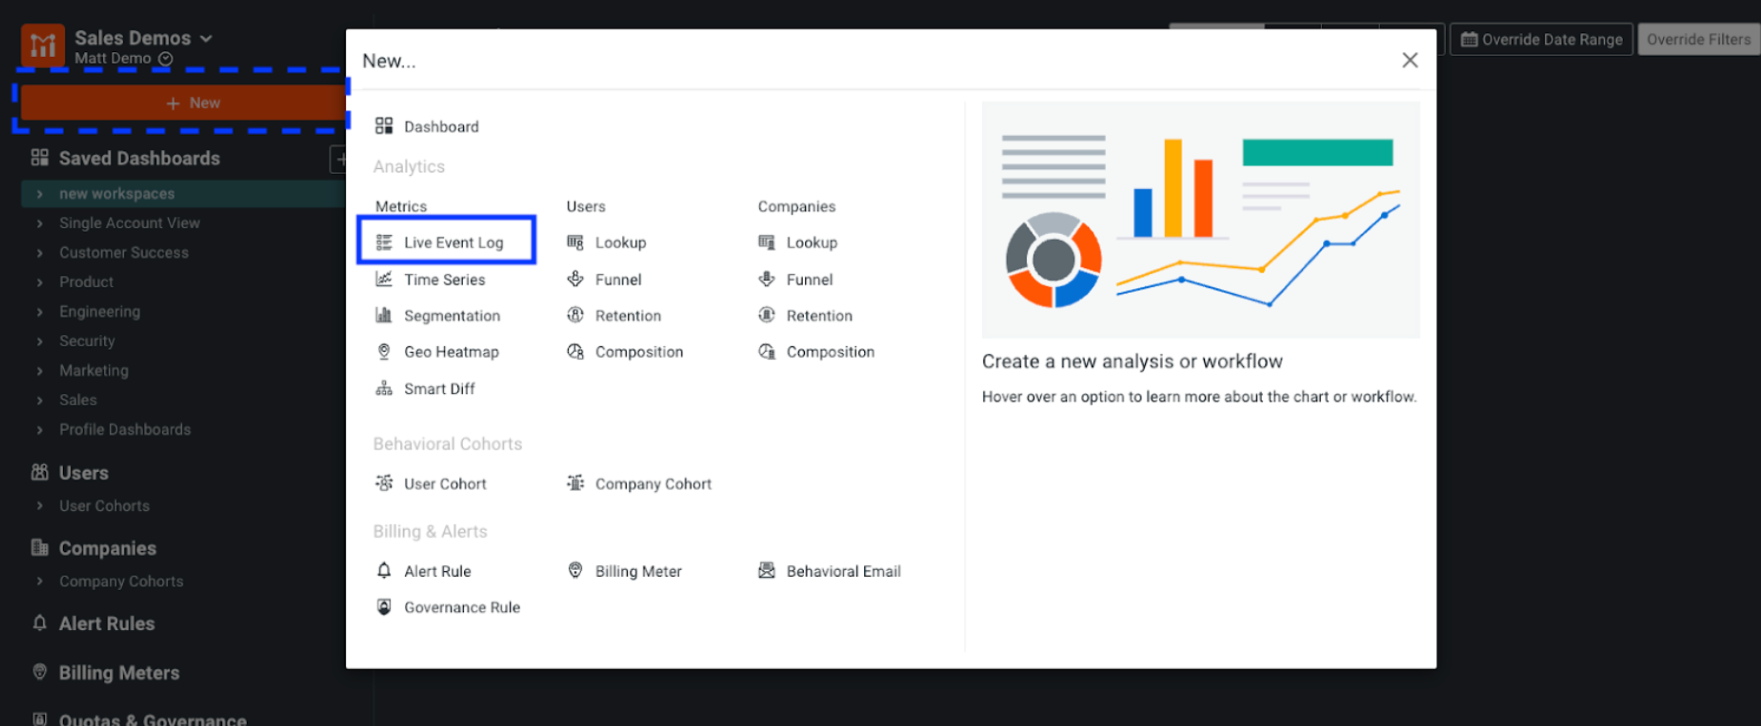
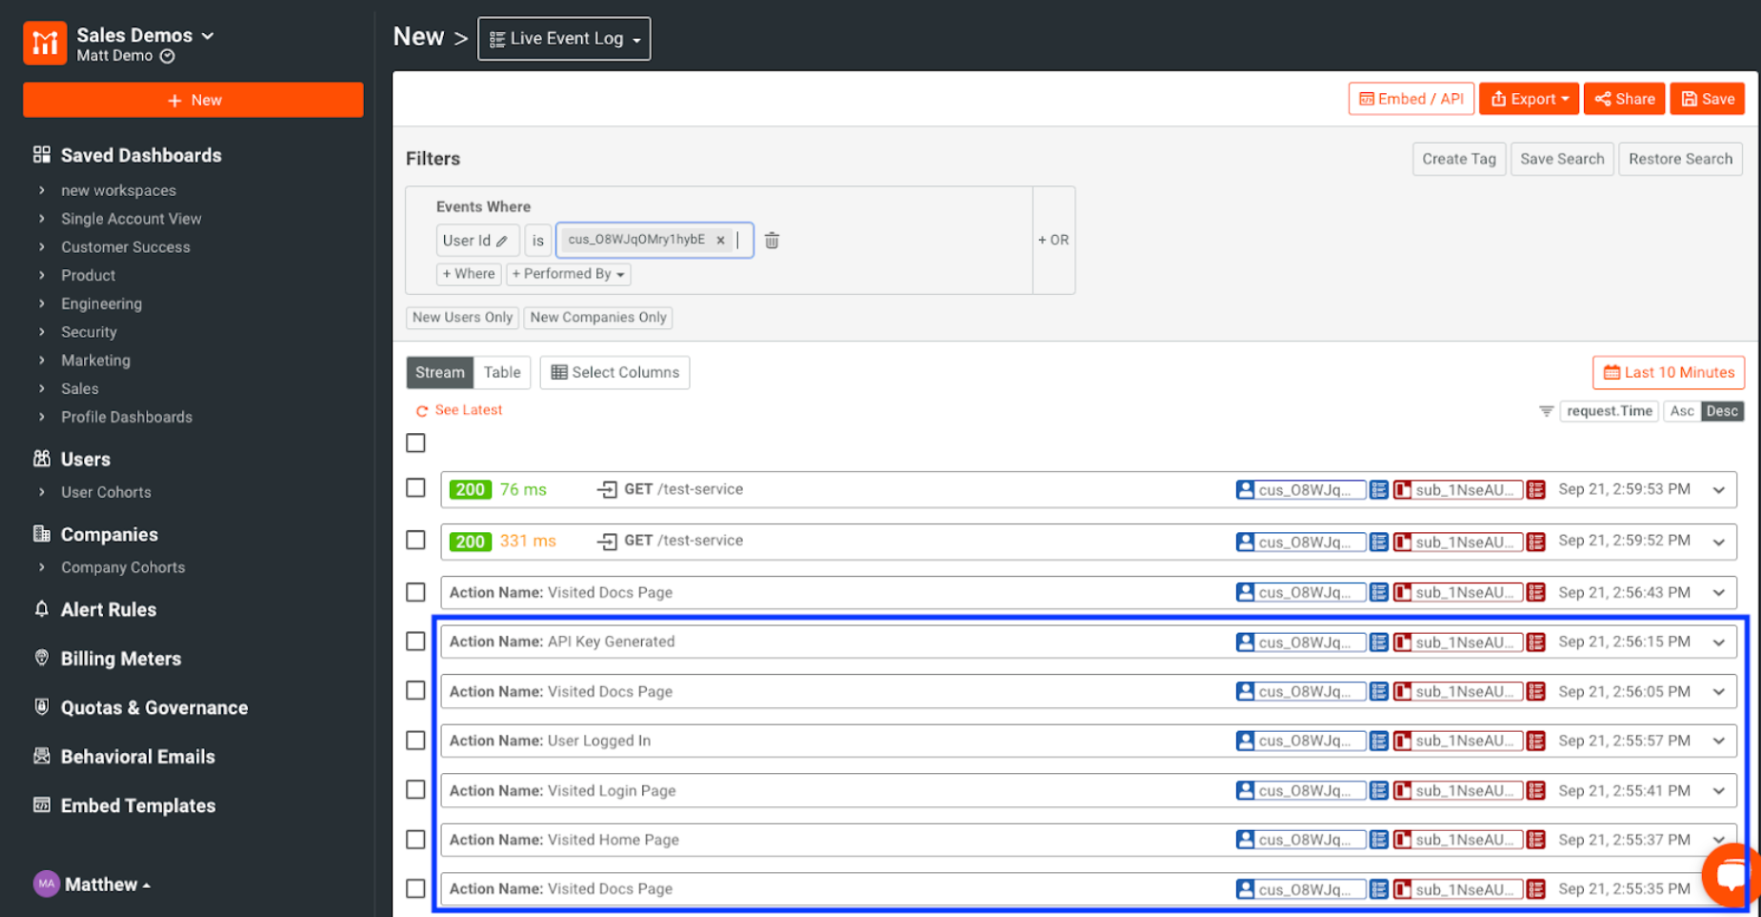
In Moesif, click on the + New button and select Live Event Log.
On the Live Event Log screen, you’ll be able to see that events are coming in from Segment. Note that the Segment ID (the one used in track calls) should match up with the Moesif User Id if you already have Moesif integrated with other systems, such as an API gateway. Since Moesif tracks both User and Company, you can look at data through various scopes. Since every event is attributed to a user, you can view and report at that level. Every user’s event data also gets tied to a company, and Moesif then allows you to see the aggregated metrics and traffic from every user within that company. This allows you to ask questions like “What companies use my product or API the most?” and “Who are the top users of my API or product?”. Both questions are similar, but the resulting report would bring quite different insights. In this example, we can see that these events are being tracked at both the User (the blue ID) and Company (the Red ID) level in Moesif.
Once the events are confirmed to be received in Moesif, we can move on to creating a report to track how users are converting within our application.
Step 4: Build a User Funnel to Track Onboarding
In Moesif, we will now go to the User screen and click on the Funnel report.
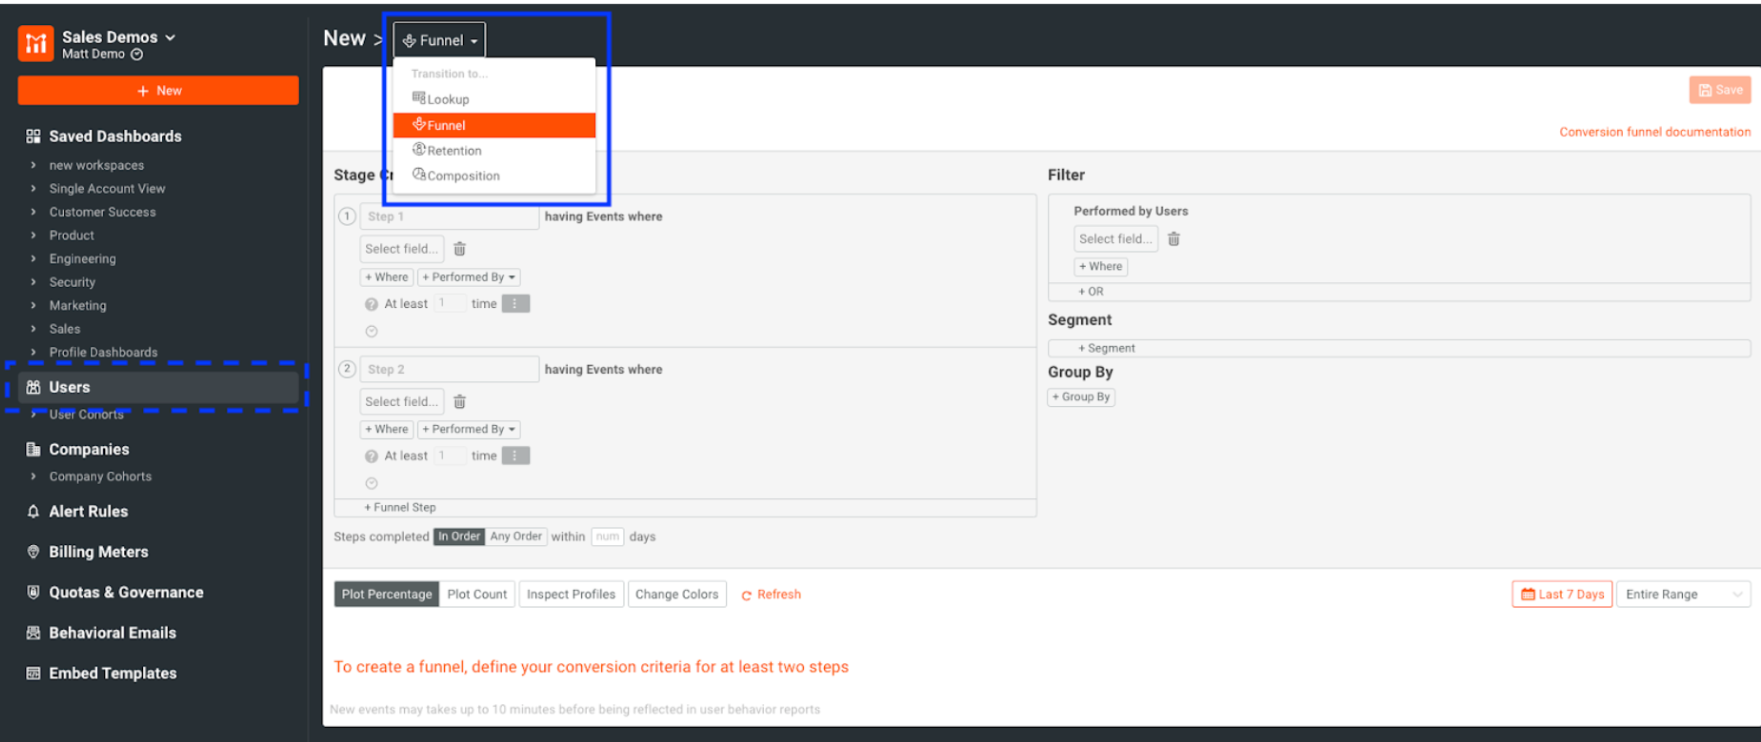
On the Funnel screen, we will begin to configure our onboarding flow to see how each step in the flow is converting. We will create our criteria for each step by clicking the Select field… dropdown to do this. For our Segment events, we will choose Action Name from the dropdown, select our operator as “is,” and choose the name of our event in the last dropdown that appears. Below is an example of an onboarding flow for users signing up to use an API. They may visit the site, log in/sign up, generate an API key, and then make an API call. Our Stage Criteria describes precisely this flow.

Once the Stage Criteria has been input, a chart will appear at the bottom of the screen showing:
The number of users that completed the onboarding step
What % of users completed each step
How long on average it took to complete each step
What users made it to each step (viewed by clicking User Ids in the table at the bottom of the screen)
Below is an example of what that output may look like based on the Stage Criteria we set above.
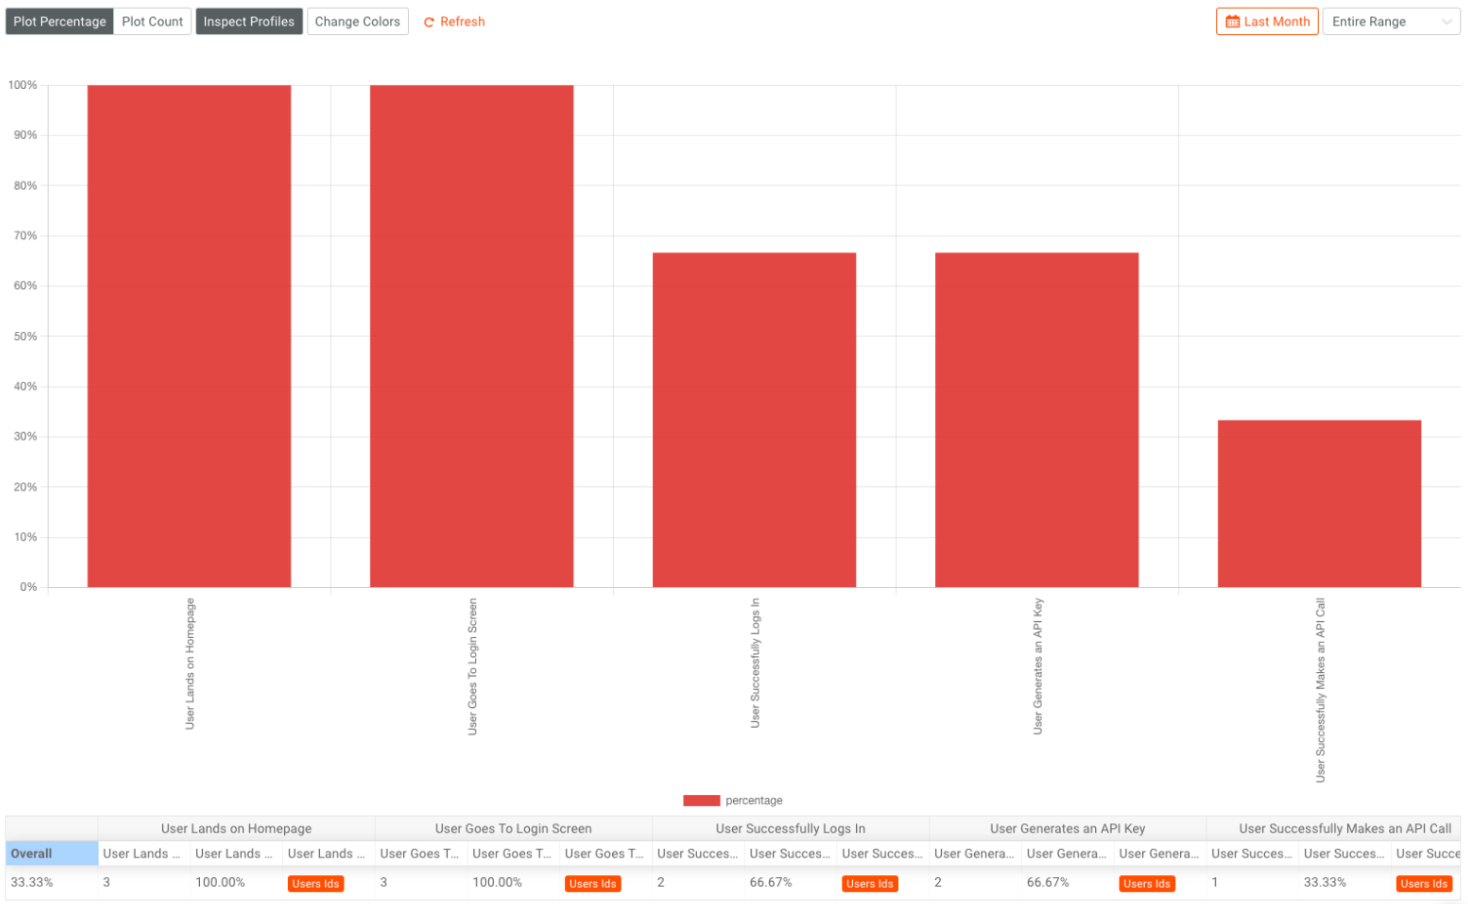
This report gives us insights into the conversion funnel over a given period. The example above is over the Last Month, but this can be set to a specific window in time, like the last day, week, year, or even an absolute data range. We will talk about the benefits of using these date ranges in the final step.
Step 5: Improve Conversions Through Metrics
Once your conversion funnel report is built, you can see what changes affect your conversion funnel. For instance, if you’ve recently changed your login flow or checkout process, you may compare your conversions from 3 months before the change against the results 3 months after. These types of comparisons allow you to see if updates or new steps in your onboarding flow are helping out with conversions or hindering them. You can also use these charts to monitor your conversion rate in real time. Even better, you can put a variety of onboarding reports, including a conversion funnel, on a Moesif Dashboard so your team can easily access the data to inform them.
Wrapping Up
In this recipe, we’ve seen how you can use Moesif and Segment together to track user actions and report on the effectiveness of your onboarding flow and how customers are converting. In all, we covered how to::
Add Moesif as a Segment destination
Confirm the integration is working correctly
Build a conversion funnel report in Moesif
Use these reports to improve onboarding and conversions within your product
As one of the most critical factors in making customers successful, seeing the entire picture when it comes to customer onboarding and conversion is crucial. Diagnosing issues within these two domains can help you attract and retain more customers and directly bump up your revenue to the next level. With Moesif and Segment, building comprehensive reports on onboarding and conversion metrics is easy, and, most importantly, holistic.
Getting started is easy
Start connecting your data with Segment.