Automate Journeys with Segment & Marketing Cloud

Learn how to harness real-time behavioral data from Twilio Segment to trigger personalized, automated journeys in Salesforce Marketing Cloud—without manual exports or complex custom builds. This guide also shares best practices for syncing data to Data Extensions using Segment’s Actions destination, along with configuration tips to ensure accurate, reliable activation across the Salesforce ecosystem.

Made by Vokal

What do you need?

  • An active Unify Workspace in Segment

  • Your tracking plan events implemented on the website (e.g., product viewed, product added, order completed)

  • Access to a Salesforce Marketing Cloud Business Unit with permissions to create Data Extensions

  • A defined lifecycle use case to target, such as Abandoned Browse, that we’ll cover in the recipe

Easily personalize customer experiences with first-party data

With a huge integration catalog and plenty of no-code features, Segment provides easy-to-maintain capability to your teams with minimal engineering effort. Great data doesn't have to be hard work!
On this page

Step 1: Import Subscriber Keys into the Unify Workspace

1. Confirm the primary identifier used in SFMC (preferably Subscriber Key).

2. Choose your method to import Subscriber Keys:

  • Use Salesforce Source and field mapping, if available.

    i. If Subscriber Keys originate from Salesforce, they are typically tied to Contact IDs.

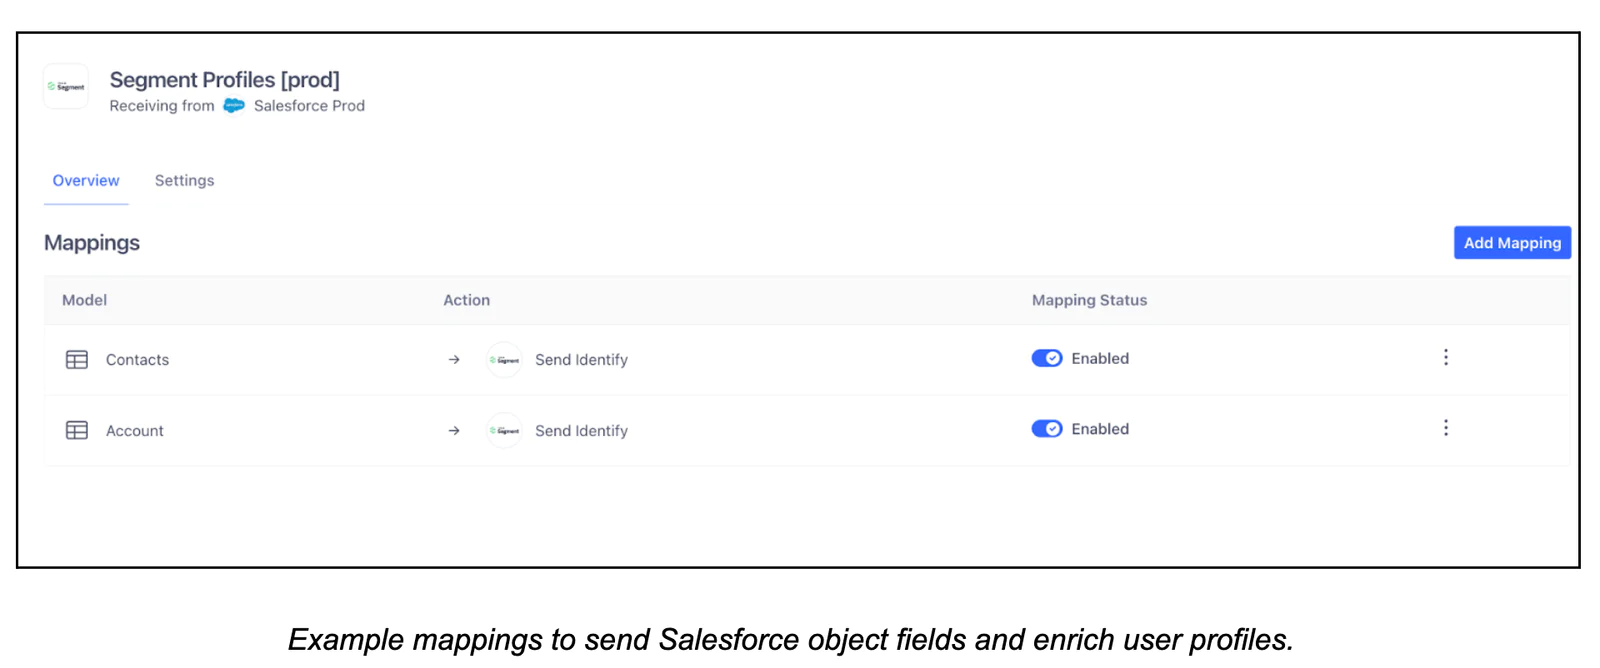
    ii. Use the Salesforce source in Segment and map the relevant fields to bring Subscriber Keys and email opt-in status into the Unify Workspace.

    iii. Review Segment's official Salesforce Unify Integration documentation.

Interface showing segment profiles mappings with actions to send identity for contacts and accounts.
  • Otherwise, use email as the user platform identifier or leverage custom methods such as Reverse ETL or Insert/Destination Function that fetch Subscriber Keys via the SFMC API.

3. Ensure that these identifiers are available within the Unify Workspace to be passed downstream to SFMC.

Step 2: Enable the Salesforce Marketing Cloud (Actions) Destination 

1. From Segment’s Destinations Catalog, connect Salesforce Marketing Cloud (Actions) Destination to Unify Workspace.

2. Enter your SFMC credentials and API keys to enable the connection.

Review Segment's official SFMC Destination documentation.

Step 3: Build Event-Triggered Journey

In this example, we’ll walk through the logic for an Abandoned Browse Journey. 

  1. Define Journey Logic & Structure:

    • Trigger: A known user views a product on the site

    • Condition: The user does not add the product to the cart or complete a purchase

    • Action: Send a personalized email X hours after the browsing behavior is detected

  2. Define Personalization Parameters:

    • Use Computed Traits such as: Last Product Viewed or Most Frequently Viewed Product

    • If available in your Unify Workspace, include Product Recommendation traits to tailor the content

  3. Building the Journey in Segment:

    • Use Product Viewed as the entry event

    • Set a clear exit condition (e.g., user makes a purchase or adds to cart)

    • Configure timing, branching logic, and personalization fields within Journey Builder to reflect your goals

Review Segment's official Journey V2 documentation.

Flowchart showing the funnel percentage for an Abandoned Browse Journey using Segment.
Interface showing branches in a workflow with options to add events and handle duplicate events.

Step 4: Destination Step Activation

Once the Journey is built in Segment, the next step is to configure the Destination Step.

In Segment:

  • On the Destination step, select the connected Salesforce Marketing Cloud (Actions) Destination.

  • Choose the action to trigger in SFMC, typically either:

    • Send contact to a Data Extension

    • Send API Event

  • Map the action to the appropriate identifiers and traits.

  • Review the payload preview to confirm the journey attributes map correctly to the destination fields.

  • Test the payload to validate successful delivery.

Send to destination settings with step name, destination key, and activations listed in Marketing Cloud.

In Salesforce Marketing Cloud, we’ll walk through the “Send contact to a Data Extension” action as an example. 

  • Go to Marketing Cloud, in the menu,  click on “Email Studio” then “Email”.

  • In the Mail menu, click on Subscribers and then on Data Extension.

  • On the Data extension, click on “Create”:

    • Create a Data Extension with the same fields defined in the Segment mapping.

    • Make sure to test that the payload was successfully received and stored in the Data Extension.

Form for creating a new data extension with fields for creation method, name, external key, and description.

Create the Data Extension and assign it a name.

Screenshot showing the process of creating a new data extension with fields and properties in a software interface.

Add the same fields to the mapping in Segment.

Bonus!

  • Send  SKUs, names, and other product-viewed properties to personalize Abandoned Browse emails with the exact products each user viewed.

  • Add traits like “likelihood to purchase,” enabling you to target users less likely to convert with tailored incentives such as a free shipping offer.

Step 5: Finalize Journey in SFMC

Once the Journey is configured in Segment and connected to Salesforce Marketing Cloud, the final steps are:

  • Publish the Journey in Segment to begin sending real-time data to SFMC.

  • Build and activate the customer-facing journey in Marketing Cloud, including the relevant email templates or automations.

  • Run validation tests to ensure the data, triggers, and messaging flow correctly across both platforms.

  • Measure performance by monitoring key metrics (e.g., open rates, conversions) and refining the journey for continuous improvement.

Wrapping Up

In this recipe, we’ve:

  • Synced journey event data from Segment into Salesforce Marketing Cloud.

  • Automated personalized campaigns, like abandoned browse emails, that re-engage users and drive conversions.


Getting started is easy

Start connecting your data with Segment.