Recipes
MarketplaceB2BMediaMobile

Improve product retention rates with targeted push notifications

This recipe teaches you how to use mobile push notifications to re-engage a subset of dormant users. By sending a promotional message or raising awareness for a new product feature, you'll drive further engagement

Segment

Made by Segment

What do you need?

  • A push notifications tool - we're using Braze in this recipe

  • Android or iOS mobile source with event tracking

Improve product retention rates with targeted push notifications

With a huge integration catalog and plenty of no-code features, Segment provides easy-to-maintain capability to your teams with minimal engineering effort. Great data doesn't have to be hard work!

Get started for free

Whether you are building a Consumer App or a SaaS product, retention separates successful products from failed ones. Retention is not only the primary measure of product value and product/market fit, but it is also a big driver of monetization and acquisition. 

In today’s digital age, where average human attention span has fallen from 12 seconds in 2000 (or around the time smartphones hit the scene) to eight seconds, engaging users effectively and turning them into DAUs (daily active users) is no easy feat. This recipe teaches you how to use mobile push notifications to re-engage a subset of dormant users. By sending a promotional message or raising awareness for a new product feature, you’ll drive further engagement.

Step 1: Setup data-tracking on your App

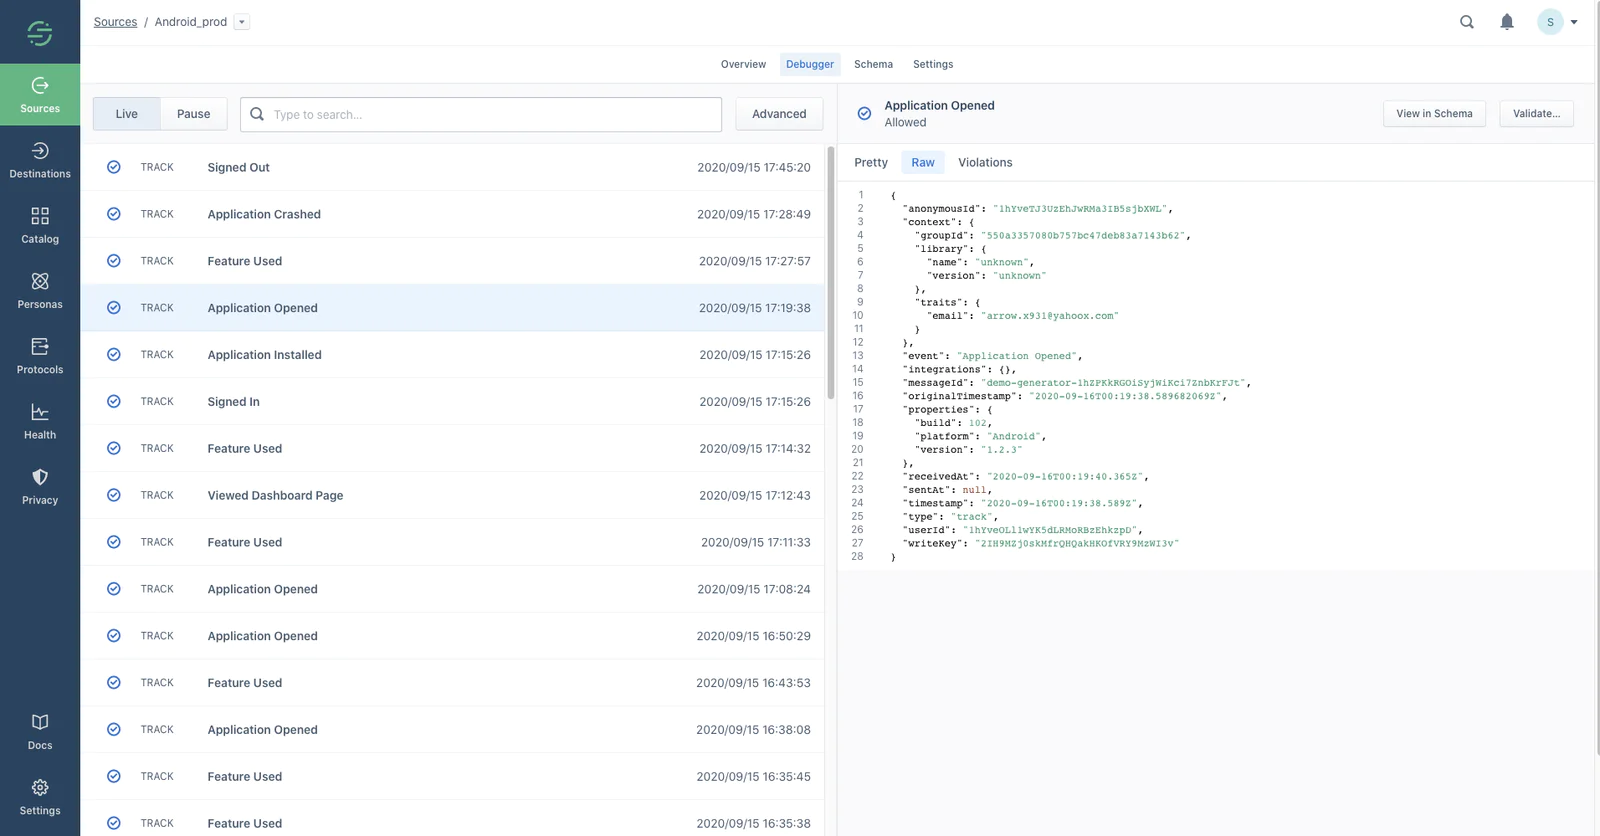
The first step is to sign-up or login to the Segment App. Next, create a Source for your Mobile App. A Source is where events such as Application Opened, Feature Used are collected and sent to Segment. Since we’d be sending mobile push notifications, we recommend you begin with an iOS or Android source. After you set up your Source, you’ll begin to implement events. Events are essentially actions such as screen views or button clicks performed by your users on your App. You can implement events by bundling our Android or iOS SDK with your App. Check outthese docs to learn more about setting up your source. 

Note: If you are already sending Session Start events to Braze, you can skip steps 1 & 2 by using the "Last Used App Filter" in Braze. 

We recommend you to instrument below events to understand what actions users are performing on your App.  Application Lifecycle Events

Product Usage Events (examples below)

  • Action Performed

  • CTA Clicked

  • Feature Used

In addition to the track events, we also require you to send an identify call each time a user registers, logs in, or updates their info.

An sample Android Source on Segment

Step 2: Connect Braze Destination with Twilio Engage (formerly Segment Personas)

In this recipe, we will be using Engage to create an audience of inactive users and send the info to Braze, a customer engagement platform that lets you send emails, SMS, and push notifications to users.

So the next step would be to connect enable Braze Destination inside Segment. Go to the Engage page and navigate to the Destinations section.

Personas Destination Setup Screen

Click “Add Destination” and then search for “Braze” within the Destinations Catalog and enter the API key details to enable the destination. Please see these detailed instructions if you need help.

Braze Destination Settings Page

Step 3: Create a New Audience in Personas and send it to Braze

After you have successfully enabled the Braze Destination, the next step is to create an audience of dormant users you’d like to activate by sending a push notification. Navigate to the Audiences page, click the “New Audience” button to create a list of users or accounts that match your criteria, and send that information to Braze and other marketing tools.

Note: 

  1. You can build an audience from any of the events that are connected to Personas. This includes any track, page, or screen calls.

  2. You can use the property button to refine the audience on specific event properties as well. Select and not who to indicate users that have not performed an event.

  3. You can also specify two different types of time-windows, within and in between. Within lets you specify an event that occurred in the last x number of days. In-between lets you specify events that occurred over a rolling time-window in the past.

In this Recipe, we are building an audience of users who discovered and installed the App via “Google” but haven’t opened the application in the last 15 days. You can construct your audience query and preview the results. Click on any user to get a 360-degree view of their profile.

Personas Audience Builder

Next, select the Destination(s) you would like to sync the Audience information, in this case Braze.

Personas Destination Selection Screen

Finally, give your audience a name and description that allows you to identify your users inside Segment and in your Destinations. Hit the “Create Audience” button.

Personas Create Audience Screen

You can now login to Braze to find your newly created Audience of Inactive Users.

Step 4: Create a Push Notification campaign with Braze

In order to send push notifications to users, the first step is to create a Segment of relevant users you’d like to target inside Braze. Navigate to the “Segments” page and click the “New Segment” button to create a new Segment of users. Name your segment by describing the type of user you intend to filter for. This will ensure that this segment can easily and accurately be the target of multiple campaigns or Canvases to come.

Braze Create Segment Screen

Filter by Custom Traits, select the 15_day_inactive_users_google audience name we created in Segment Personas, and save the Segment. Once you’ve clicked “Save” you’re ready to start sending messages (or) notifications to your users.

Braze Segment Audience

Now, navigate to the Campaigns page to create a Push Notifications campaign, then select your notification platform — iOS or Android or Web. Now compose your notification message by choosing a title, message, and push icon image. 

TIP:Heres a great blog post from Braze on writing a good push notification copy. 

Braze Push Notification Campaign Builder

After you finish composing your perfect push message, you should test it before sending it out! Navigate to the test page by clicking the “Test” button denoted by the eye symbol. Use Preview Message as User to get a sense of how your message may view on mobile. Use the “Send Test” to ensure that your message displays properly.

Step 5: Scheduling your Campaign

Once you have tested your push message, schedule your campaign and select your target users. We will be choosing the “Scheduled Delivery” type since to reach out to users who didn’t login in the last 15 days. 

Braze Schedule Delivery

Next, specify the target users by select the Segment of “15-day Inactive Users” we just created in Step #4.

Braze Campaign Targeting Step

Braze allows you to track whether users perform specific actions (Conversion Events) after receiving a campaign. In this recipe, we are going to choose “Start Session” as our Conversion Event, since we want users to come back to the App.

Braze Campaign Conversion Step

Step 6: Review and Deploy 

The final page will give you a summary of the campaign you’ve just designed. Click “Launch Campaign” to send. Confirm all the relevant details and watch the data roll in!

Braze Push Notification Campaign Review screen

Results

Braze will show you the number of messages sent and opened over time for each push campaign you deploy. Here’s an example:

Braze Push Notification Campaign Results screen

For push notifications, you can view statistics for the number of messages sent, delivered, bounced, opened, and directly opened.

Wrapping up

Here’s what we’ve done in this growth recipe:

  • Created a Source for your Mobile App to track events

  • Connected your Source with Braze to send targeted push notifications

  • Identified inactive users and created a mobile push notification campaign 

  • Launched the campaign to improve product usage and retention rates.

Getting started is easy

Start connecting your data with Segment.