Give customers a personalized experience with Airship and Twilio Segment

In this recipe, you’ll learn how to use Twilio Segment and Airship together to improve the post purchase experience. You’ll be able to personalize interactions and provide valuable product recommendations that drive repeat value.

Made by Airship

What do you need?

  • Airship

  • Segment

Easily personalize customer experiences with first-party data

With a huge integration catalog and plenty of no-code features, Segment provides easy-to-maintain capability to your teams with minimal engineering effort. Great data doesn't have to be hard work!
On this page

Customers don’t just want personalized experiences, they expect it. Past Airship studies show that brands seeing the best ROI on their mobile app are leveraging personalized content - so there’s never been a more important time to start connecting your mobile tech stack. 

Before we get started - it’s important to note that you must implement named_user in Airship, and the Twilio Segment UserID must match the named_user ID in Airship. If the named_user and UserID do not match, Airship will not be able to make an association for identify, track, or group events to the intended user in Airship. You can learn more about how named_users work here.

Step 1: Configure Segment source integration

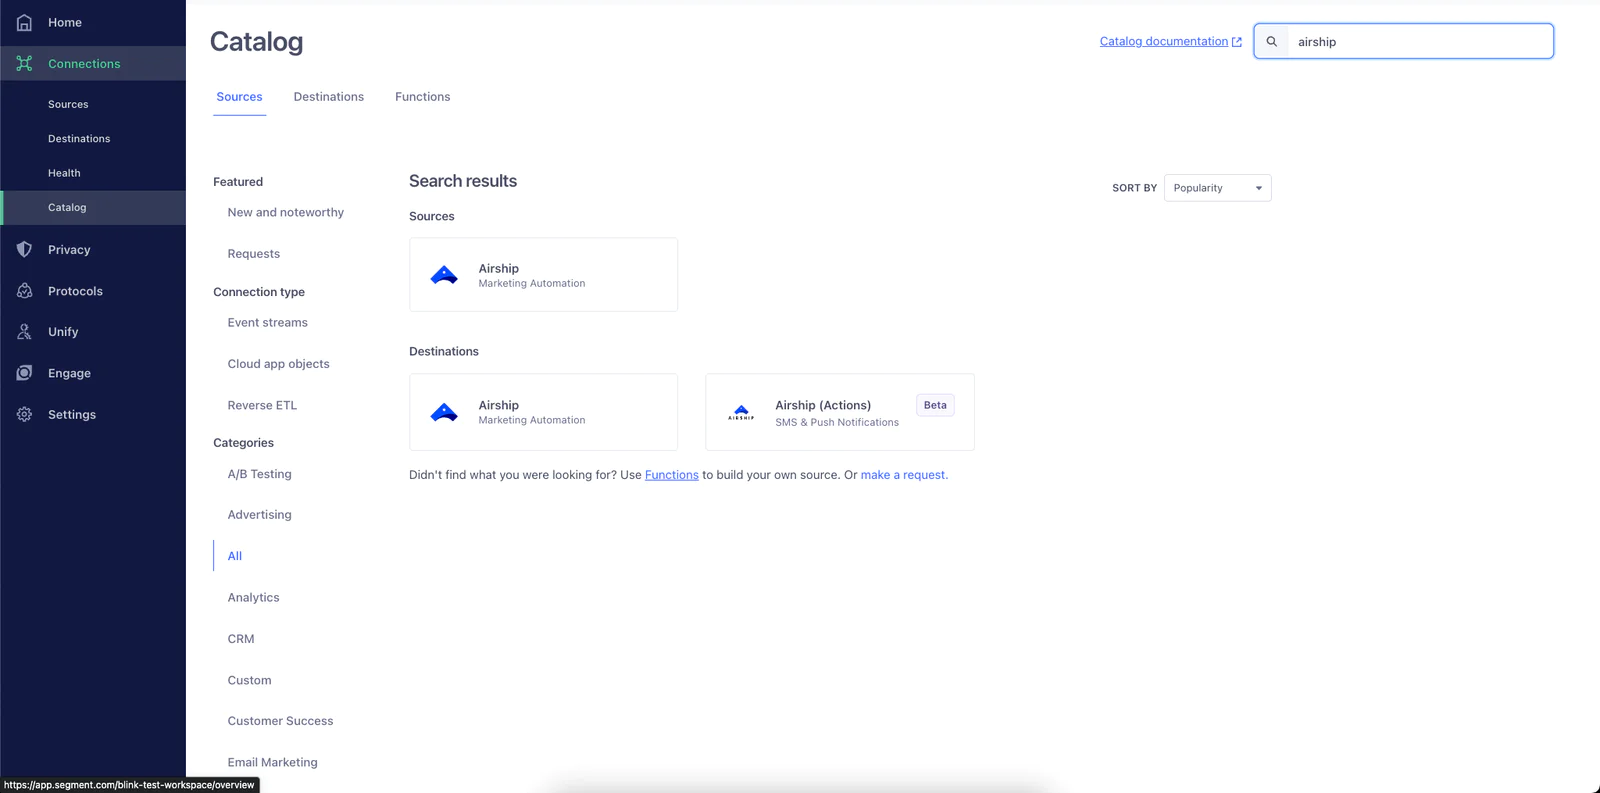
The first step to sending great personalized abandoned cart campaigns with the Airship + Twilio Segment integration is by creating or connecting to a data source within the Airship Actions destination. To do this, you’ll need to first search for a destination, find Airship (Actions) and select add destination. Then you’ll follow the prompts to provide the access token, app key, and data center location (US or EU).

as1

Since the Airship + Twilio Segment integration is flexible you’ll have the ability to enable exactly what actions you want to perform. By navigating to the mappings section you can choose what you’d like to enable by toggling items on or off under the status option. 

Here you will also be able to add conditions when an event comes from a source like “only send if” and create logic so your campaigns are a precise as possible. 

as2

Step 2: Identify Your Custom Events 

Within the Twilio Segment platform, configure which Custom Events you want to track and send back to Airship. While Twilio Segment provides several events out of the box, your options are limitless when it comes to using the Visual Tagger (or implementing via API). These events can be page views, links, or button clicks - essentially any action a customer can take within your app. In this instance you’ll leverage abandoned_cart as the event.

as5

Airship Custom Events must have an Audience (Named User), an Occurred Time, and a Name. These default to userId, timestamp, and event. Feel free to modify, but note that they must exist and be valid. Custom Events can also (optionally) have properties, and these default to items in the properties object.

Remember that the more events you track, the better you can understand your customers and provide a stronger, personalized experience.

Here is an example of some of the events you may choose to track:

as25

Step 3: Create a Sequence within Airship 

Once you’ve configured the Airship + Twilio Segment integration and defined the events you’d like to track, it’s time to create a Sequence within Airship. If you don’t have access to the Airship platform, you can request a demo to get started. Once you’ve logged into the Airship platform and select the “+” in the upper right corner. 

as6

From the create screen you’ll select “Sequence” as the campaign type: 

as7

You’ll select the option at the bottom for “start from scratch” and begin building out your Sequence. 

Give your sequence a name that describes the purpose (in this example we are doing a post purchase follow-up campaign). 
as8

Now you’ll need to select the trigger for this Sequence. Twilio Segment events are transferred to Airship as Custom Events. You will select Custom Event. 

as9
as10

Select “Order_Completed” from the drop down menu or begin typing “Order” and you should see the event auto populate. 

** Optional Step** you can also set an event expiration. This can be used to cancel the sequence if it is older than a certain age. [USE CASE CALLOUT: If your post purchase follow up contains a limited time offer such as “purchase within the next 3 hours and receive a free coupon for a large iced tea” you can use the event expiration to cancel the Sequence for people who purchase after the 3 hour window.] 
** Optional Step** Want to target customers more specifically? You can add audience conditions to any Sequence.This means that your Sequence will go to customers who trigger the event AND meet a specific set of criteria. [USE CASE CALLOUT: Send your Sequence only to customers who made a purchase and whose favorite color is blue].  
as11

Click “Save” and return to the Sequence builder. 

as12

Now it’s time to create the message content. You’ll select “add message content” from the top of the screen.

as13

Once you’ve selected "add message content" you’ll be able to name each of the messages in your Sequence and select which channel(s) you deploy the message to. In this example we’ll create a push notification that links to a message center inbox so you can reach 100% of your customers regardless of their opt-in status. 

as14

Once you’ve selected Push Notification, you’ll have the option to combine with a Message Center message. 

as15

Begin typing your copy in the Text section shown on the screen. 

as16
Note: You can use handlebar logic to create better personalized messages by pulling in attributes like first_name. Attributes are key-value pairs that are associated with your audience to help you better target them with relevant campaigns. Check out our list of Airship Default Attributes.

From the actions tab on this page you will select “Message Center.” This will send customers to the Message Center message when they interact with the Push Notification. 

Using Airship’s WYSIWYG editor, you can drag and drop content blocks into the editor to create your message. 

as17
**Optional Step** Set up an External Data Feed (XDF) to pull in unique promo codes and coupons so you can track redemption rates and avoid using blanket or master discount codes. 

It’s time to preview your message and make sure your content is exactly the way you want it. 

as18

Once you’ve approved the copy of your message, it’s time to set the delivery. Because we’ve set a delay on the Sequence of 1 hour, you do not need to set an additional delay unless your use case calls for it. 

as19
as20

After you’ve reviewed and approved, you’ll be taken back to the Sequence map where you can add additional messages to the Sequence or select “Start” to begin sending highly personalized, targeted, and valuable messages with Airship + Twilio Segment. 

as21

Results 

Find out just how powerful your messaging can be when you track your Sequence over time. You’ll be able to monitor opens, clicks, conversion rates, and so much more. With powerful campaign insights that tell a story, you’ll be able to make data driven decisions on where to adjust your campaign strategy, compare cross channel messages, and take a look at historical performance either with Airship’s Performance Analytics. 

as22

You can learn more about managing your Sequence and Sequence Performance through Airship Docs. 

Additional Feature: The Airship and Twilio Segment integration is bi-directional so you can take data out of Airship and return it to Segment with these simple steps: 

When inside the Airship UI go to Settings >> Project Configuration and click Manage for Real-Time Data Streaming.

as23

Under this section, select Twilio Segment. From here you’ll receive a series of prompts to help you configure the integration.

as24

Getting started is easy

Start connecting your data with Segment.