Unify a customer's online and in-store purchases downstream with Segment Reverse ETL

It's easy to use Segment to track your customer's online purchases, as a visitor to your website. But online is not the only place that customers can shop and interact with your brand. It's very likely that customers shopping online will also make a purchase in your store. In this recipe, we'll make sure that the online purchases and the in-store purchases are both attributable to the same customer. This matching will create a seamless brand experience for your customers and allows you to further personalize marketing content for your customers.

Kalyan Kola Cahill Made by Kalyan Kola Cahill

What do you need?

  • BigQuery

  • Segment Reverse ETL

  • An analytics tool - we use Braze or Mixpanel, but YMMV

Easily personalize customer experiences with first-party data

With a huge integration catalog and plenty of no-code features, Segment provides easy-to-maintain capability to your teams with minimal engineering effort. Great data doesn't have to be hard work!

On this page

In this recipe you’ll set up Segment’s Reverse ETL to automatically grab CSV files of in-store purchases from your Data Warehouse and send them as purchase conversions to your analytics/email marketing tool.

Step 1: Create a bucket in Google Cloud Storage

  • Navigate to Google Cloud Storage -> Buckets and create a new bucket


Create a bucket in Google Cloud Storage
 
  • Set the region to the US (EU is currently not supported
  • Create a folder within this bucket

Step 2: Create an External Table in BigQuery from that bucket data

  • Create a new BigQuery dataset, with the data location also in the US


Create an External Table in BigQuery from that bucket data
Create a new BigQuery dataset, with the data location also in the US
 
  • Do not enable default expiration
  • Create a table in this new dataset
    • Select Create table from Google Cloud Storage
    • As the file, enter a URI pattern bucket/folder/*.csv to ensure it will grab *all* csv files from the bucket


Create a table in this new dataset
 
  • Set the table type to External Table
  • Enable Schema auto-detect
  • Under Advanced options, you may want to increase the number of errors allowed, and allow unknown values to avoid a job failing


Set the table type to External Table


Step 3: Set up BigQuery as a source for rETL

  • In BigQuery, navigate to IAM & Admin > Service Accounts

  • Click + Create Service Account to create a new service account

  • Enter your Service Account name and a description of what the account will do

  • Click Create and Continue

  • In the Grant this service account access to project section, select the BigQuery User role to add

  • Click + Add another role and add the following roles:

    • BigQuery Job User

    • BigQuery Data Editor

    • Storage Object Viewer

  • Click Done to create the Service Account

  • Click the newly created Service Account

  • Navigate to Keys and click Add Key

  • In the pop-up window, select JSON for the key type and click Create 

  • Copy the contents of the downloaded file


Set up BigQuery as a source for rETL


  • In your Segment workspace, navigate to Reverse ETL -> Sources and click Add Source

  • Select BigQuery and enter your copied credentials

  • Enter your data location and test your connection

Step 4: Build a model to grab data from that external table

  • In your Segment workspace, under Reverse ETL -> Sources, click into your newly created BigQuery source and select Add Model

  • Build your SQL query to grab the relevant data from the external table. Note that depending on what data is available in the CSV files you may need to match it to another table in your Warehouse.

  • Enter a unique identifier column, for example the order_id column


Build a model to grab data from that external table


  • Name your model, and configure the sync schedule to run hourly or at set times


Name your model, and configure the sync schedule to run hourly or at set times


  • Let it run initially and confirm there are no errors

Step 5: Setup your analytics tool as a destination and map the table data as purchase events.

Note: For this example, we selected Braze but you can substitute with your favorite!

Once your model has successfully run at least once, click on Reverse ETL -> Destinations and select Add Destination


Destinations and select Add Destination
 
  • Select Braze and click next

  • Select BigQuery as your data source and click continue

  • Give your destination a name

  • Enter the Braze API Key (created under the Developer Console in Braze) and the App ID (which can be found under the developer console as well) 

  • Select your REST Endpoint according to this reference

  • Enable the destination

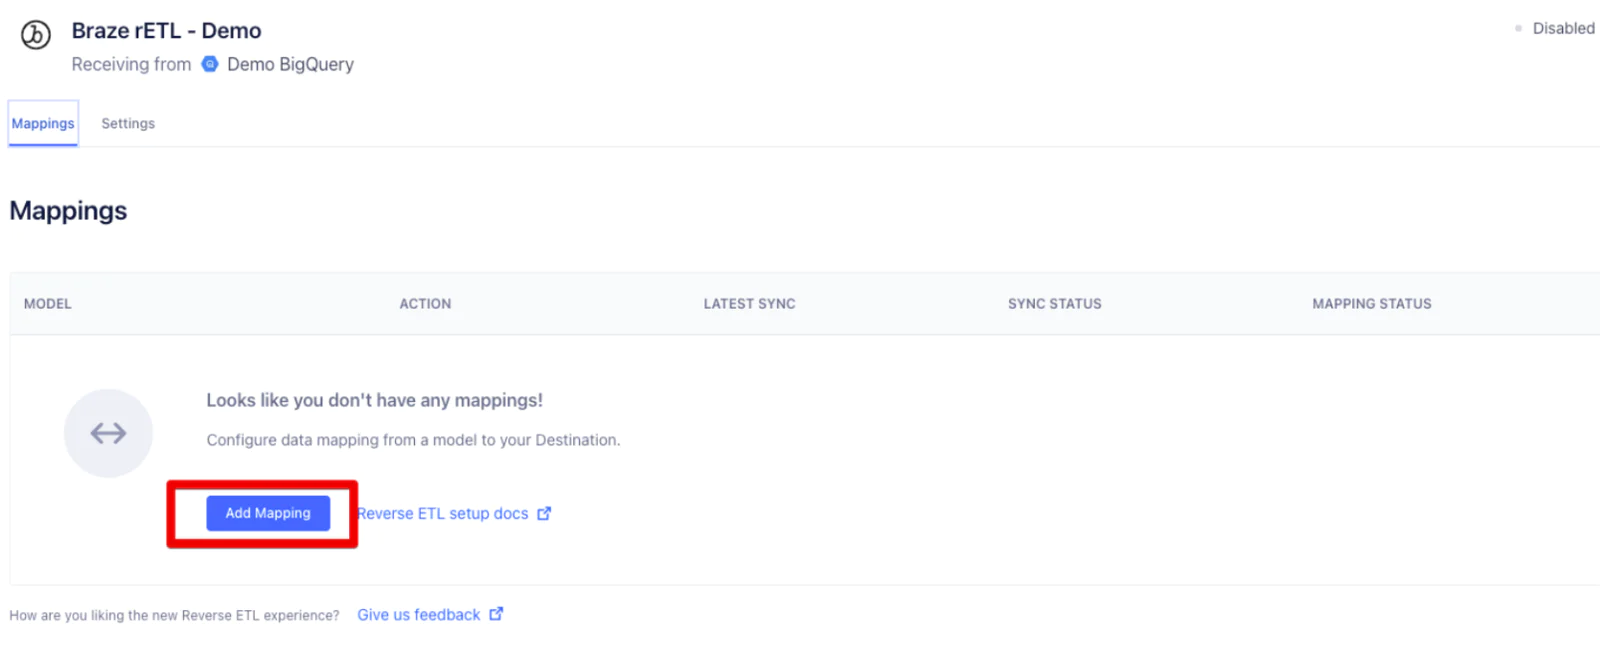
  • Navigate to the Mappings tab of the Braze destination and select Add Mapping


Navigate to the Mappings tab of the Braze destination and select Add Mapping


  • Select your model at the top, and then select the Track Purchase mapping


Select your model at the top, and then select the Track Purchase mapping


  • Set up your mappings, mapping the columns to the relevant Braze field


Set up your mappings, mapping the columns to the relevant Braze field


  • For the products mapping, select Edit Array and map each of the relevant product detail columns to the Braze product field.
NOTE: For this recipe we set product_id to the text “In Store Purchase”, as Braze recommends setting the product_id to the name or category of the product. Please see this Documentation for reference.
  • Set Update Existing Only to false

  • Test the mapping and if it’s successful click save

Wrapping up

There you have it: in-store purchases have now been associated with the same Segment profile as the customer’s online purchases.  Now you can use the customer’s in-store history to further personalize their online experience, improving your relationship with them and encouraging them to come back!

Getting started is easy

Start connecting your data with Segment.