Recipes
StartupMobileMarketplaceMediaB2BRetailAny Industry

Use behavioral events for open-time email personalization

This recipe teaches you how to use customer behavioural events from Segment inside Movable Ink to achieve open-time email personalization and improve email engagement rates.

Movable Ink

Made by Movable Ink

We know that customers look for relevancy, personal value, and an opportunity to take action when it comes to marketing communications. Conversions happen when the content is personalized based on previous interactions with your brand - which means that fully leveraging all customer behavioral data is what’s going to bring you success. Even more so if you can do it at scale. 

Movable Ink’s behavioral marketing functionality, Stories, allows you to do just this: automatically generate email and mobile app content that’s tailored to each customer based on their online behavior. Stories enables targeting based on pages or categories browsed, search terms, abandon carts, and even clicks on individual content blocks.  In this recipe, you’ll learn how to use Stories and Segment to generate behavior-based content in real-time to get customers to convert. Together, you’ll be able to:

  • Up-level your personalization with unified 360 customer profiles using web and mobile app behavioral data

  • Stream data in real-time across all platforms, including ESP and mobile messaging, to ensure campaigns are always up-to-date

  • Generate one email template to personalize infinite content variations

  • Reuse evergreen content modules to automate the delivery of new campaigns 

Step 1: Set up data tracking within Segment

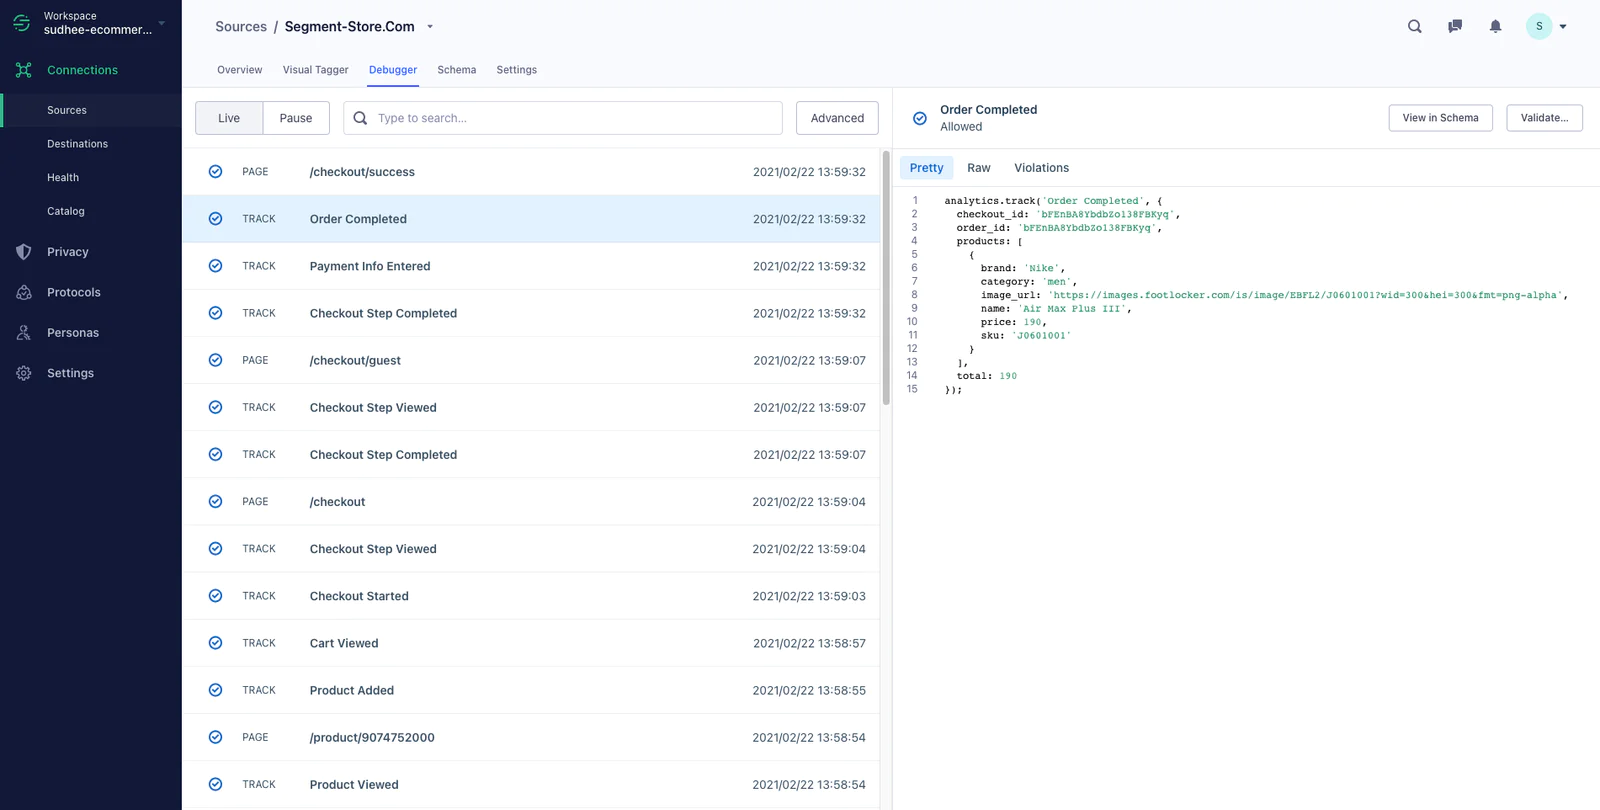
The first step is to sign-up or login to the Segment App. Next, create a Source for your eCommerce site. A Source is where events such as Product Viewed and Checkout Started are collected and sent to Segment. Segment recommends you begin with a Javascript source and install the Segment snippet on your website. Check out these docs to learn more about setting up your source.  After you set up your Source, you’ll begin to implement events. Events are essentially actions such as page views or button clicks performed by your users on your website.

Segment recommends that you track the events below to understand what actions users are performing on your site. However, Movable Ink will only be utilizing a subset of these events (details below). In addition to the tracked events, we also require that you send an identify call each time a user registers, logs in, or updates their info.

segment-source-debugger

Please see these detailed docs if you need help implementing events.

As mentioned above, Movable Ink is equipped to accept a subset of these event types and a few others. Here is a list of the MI supported event types:

movable-ink-supported-events

Step 2: Connect your Segment source to Movable Ink

Login to the Segment App, head to Destinations page, click on “Add Destination” and then search for “Movable Ink” within the Destinations Catalog and confirm the Source you’d like to connect to.

To enable Movable Ink destination you must provide an API key/token. You should reach out to your MI Client Experience team who will provide you with your token and discuss your intended use cases.

Once you receive the token you can follow the steps on this page to turn on the connection within your Segment account.

movable-ink-segment-destination

Step 3: Configure your Segment events to align with MI Spec

You may need to configure your event payloads within Segment to match the expected specifications on the Movable Ink side. This can be done in two ways:

  1. Source Function:

    1. You can connect your source to a Repeater Destination and then connect that Repeater to a Source Function, which you would build to edit the payload of their events to match the spec that the Movable Ink integration requires. Then, replay all their source events to the Repeater which would in turn send that data to their Source Function, which would then perform the transformation on the payload. Finally, you would connect the Source Function to Movable Ink which would be receiving the same data except in the format Movable Ink needs.The event timeline would be Source > Repeater > Source Function (which transforms the payload) > Movable Ink

  2. Protocols Transformations:

    1. This feature allows you to change data as it flows through Segment to customize data for a specific destination. Since this is an add-on feature, please reach out to your Segment contact to provision that feature.

You can also work with your Movable Ink account team to identify where transformations might be required. 

Step 4: Build content blocks in Movable Ink

Use Movable Ink’s prebuilt behavioral apps to create content that is powered by a user’s most recent behavior. For example, use MI’s “Recently Viewed Item” app if you want to display the last product(s) a user was browsing.

movable-ink-recently-viewed-item-feature

Or use the “Cart Item” app to display the most recent product(s) that the user has added to their cart.

movable-ink-cart-item

The apps are built on top of Movable Ink’s Studio which allows you to have complete control of the creative. Use any font, colors, sizing, and spacing to meet any brand guidelines. You can set it up once and use the same app across many campaigns. Updates are easy to make and happen in real time.

movable-ink-studio

Step 5: Configure targeting rules in Movable Ink

Use Movable Ink’s pre-built behavioral targeting rules to create business logic to dictate when the content block should be displayed.

movable-ink-segment-event-targeting

Targeting rules can be very basic IF-THEN statements such as “If a user recently browsed an item, display recently viewed app content,” or they can consist of complex mixed boolean and nested logic.

movable-ink-targeting-rules

With Movable Ink’s waterfall logic targeting, you have the ability to add fallback content for every block you create. In this case, if the user does not meet the targeting criteria we can show a completely different experience or we can collapse the block with a 1X1 transparent spacer pixel.

Step 6: Export MI creative tags to your Email tool (ESP)

Once your creative is set up and your targeting rules are applied, you’re ready to hand off your MI creative tag to your Email tool. Movable Ink creative tags are a simple snippet of HTML consisting of an image and a link that can be copied into any HTML template and deployed via any ESP.

movable-ink-email-builder
movable-ink-segment-campaign-builder

Wrapping up

Here’s what we’ve covered in this recipe:

  1. Set up data tracking within Segment to begin collecting user events

  2. Connect your Segment source to Movable Ink by providing an API key/token

  3. Configure your Segment events to match the expected MI specifications, through a Source Function or Protocols Transformation

  4. Build content blocks in Movable Ink powered by a user’s most recent behavior

  5. Configure targeting rules in Movable Ink to determine when content should be displayed

  6. Export MI creative tags to ESP after content and targeting rules are applied

  7. Sit back and watch the magic happen 🎉

You are now ready to up-level your content personalization for email with MI Stories and Segment!

Getting started is easy

Start connecting your data with Segment.