Bridge anonymous and known IDs for a complete view of the customer
A featured customer story, this blog explains how to use a CDP to bridge anonymous and known data.
By Vikash Koushik
A featured customer story, this blog explains how to use a CDP to bridge anonymous and known data.
This blog was originally written by Vikash Koushik on the blog 42slash.
Most organizations view marketing operations as plumbers who you can call to fix the broken pipe. But not enough companies look at them like an architect.
Early 2018, I joined Zepel to run their marketing. While running campaigns and writing copy, one thing that bothered me repeatedly was not knowing how exactly people behaved once they got into the product.
Sure, we were tracking in-app events. It wasn’t enough to know how my campaigns performed and how people behaved in the product separately. I wanted to know how experiences outside the product influenced people’s behavior inside the product.
My thought process was simple - How can I connect the dots between what people did before they signed up for our product with what they do after signing up to provide a unique experience at scale?
I realized we needed to create a single repository of a customer’s behavior irrespective of where it happens - marketing campaign, blog, help article, live chat, product, or email.
For most organizations this would mean sending all the data to a warehouse and creating dashboards on Tableau or PowerBi. From what I’ve seen, this is often a slow and an expensive process.
So I built my own single view of the customer with Segment and Mixpanel at the centre. Here’s how.
Before we can connect anonymous website activity to product activity, we first need to capture website data (page views, source, goals, and other data) into Google Analytics via Segment.
This is a rather simple step.
Login to your Segment account and add Segment’s analytics.js as a source.
Copy the Segment snippet and paste it high in the <head> of your website.
This only collects website data into your Segment which allows us to send this data into other tools when we need it.
Now, go into your Segment account and add Google Analytics as the destination. This will push all your website data into your Google Analytics.
To send this data into Mixpanel, add Mixpanel as a destination inside your Segment account and enter your Mixpanel account’s API Secret and Token. Once you’ve added Mixpanel as a destination, make sure you have “Track All Pages to Mixpanel with a Consolidated Event Name”.
This will ensure that whenever someone visits your website, an event called “Loaded a Page” will be sent to your Mixpanel account along with other properties such as UTM parameters, what page they’re in, etc.
At the base of this entire operation is data. Since we’ll be passing data to multiple tools via Segment, I found that without having a set naming convention for your events, it’s nearly impossible to make sense of things after you hit a certain threshold.
The naming convention I followed had two simple rules:
All actions will be tracked as an event that is named as “Verb + Button/Field/Activity Name”. For example “Created Project” or “Sent Campaign” or “Filtered View”.
I do not include where or how they performed these actions. These details go in as properties of an event.
Having this in place allowed everyone in the team to freely use data whenever they wanted without depending on one single person. This also ensured that when we wanted to slice and dice our data, we did not have inconsistencies that prevented us from getting the information we wanted.
Depending on your product’s tech stack, choose one of Segment’s sources to collect and send product specific events to Mixpanel.
At this point you should ideally have your website specific data and product activities flowing into Mixpanel. However, they still would not be linked together. This means you’ll have two separate profiles - one without user information for all the website activity and another one with all the user information for all the product activity.
To merge these data, you’ll have to use Segment’s alias method.
Here’s how it works:
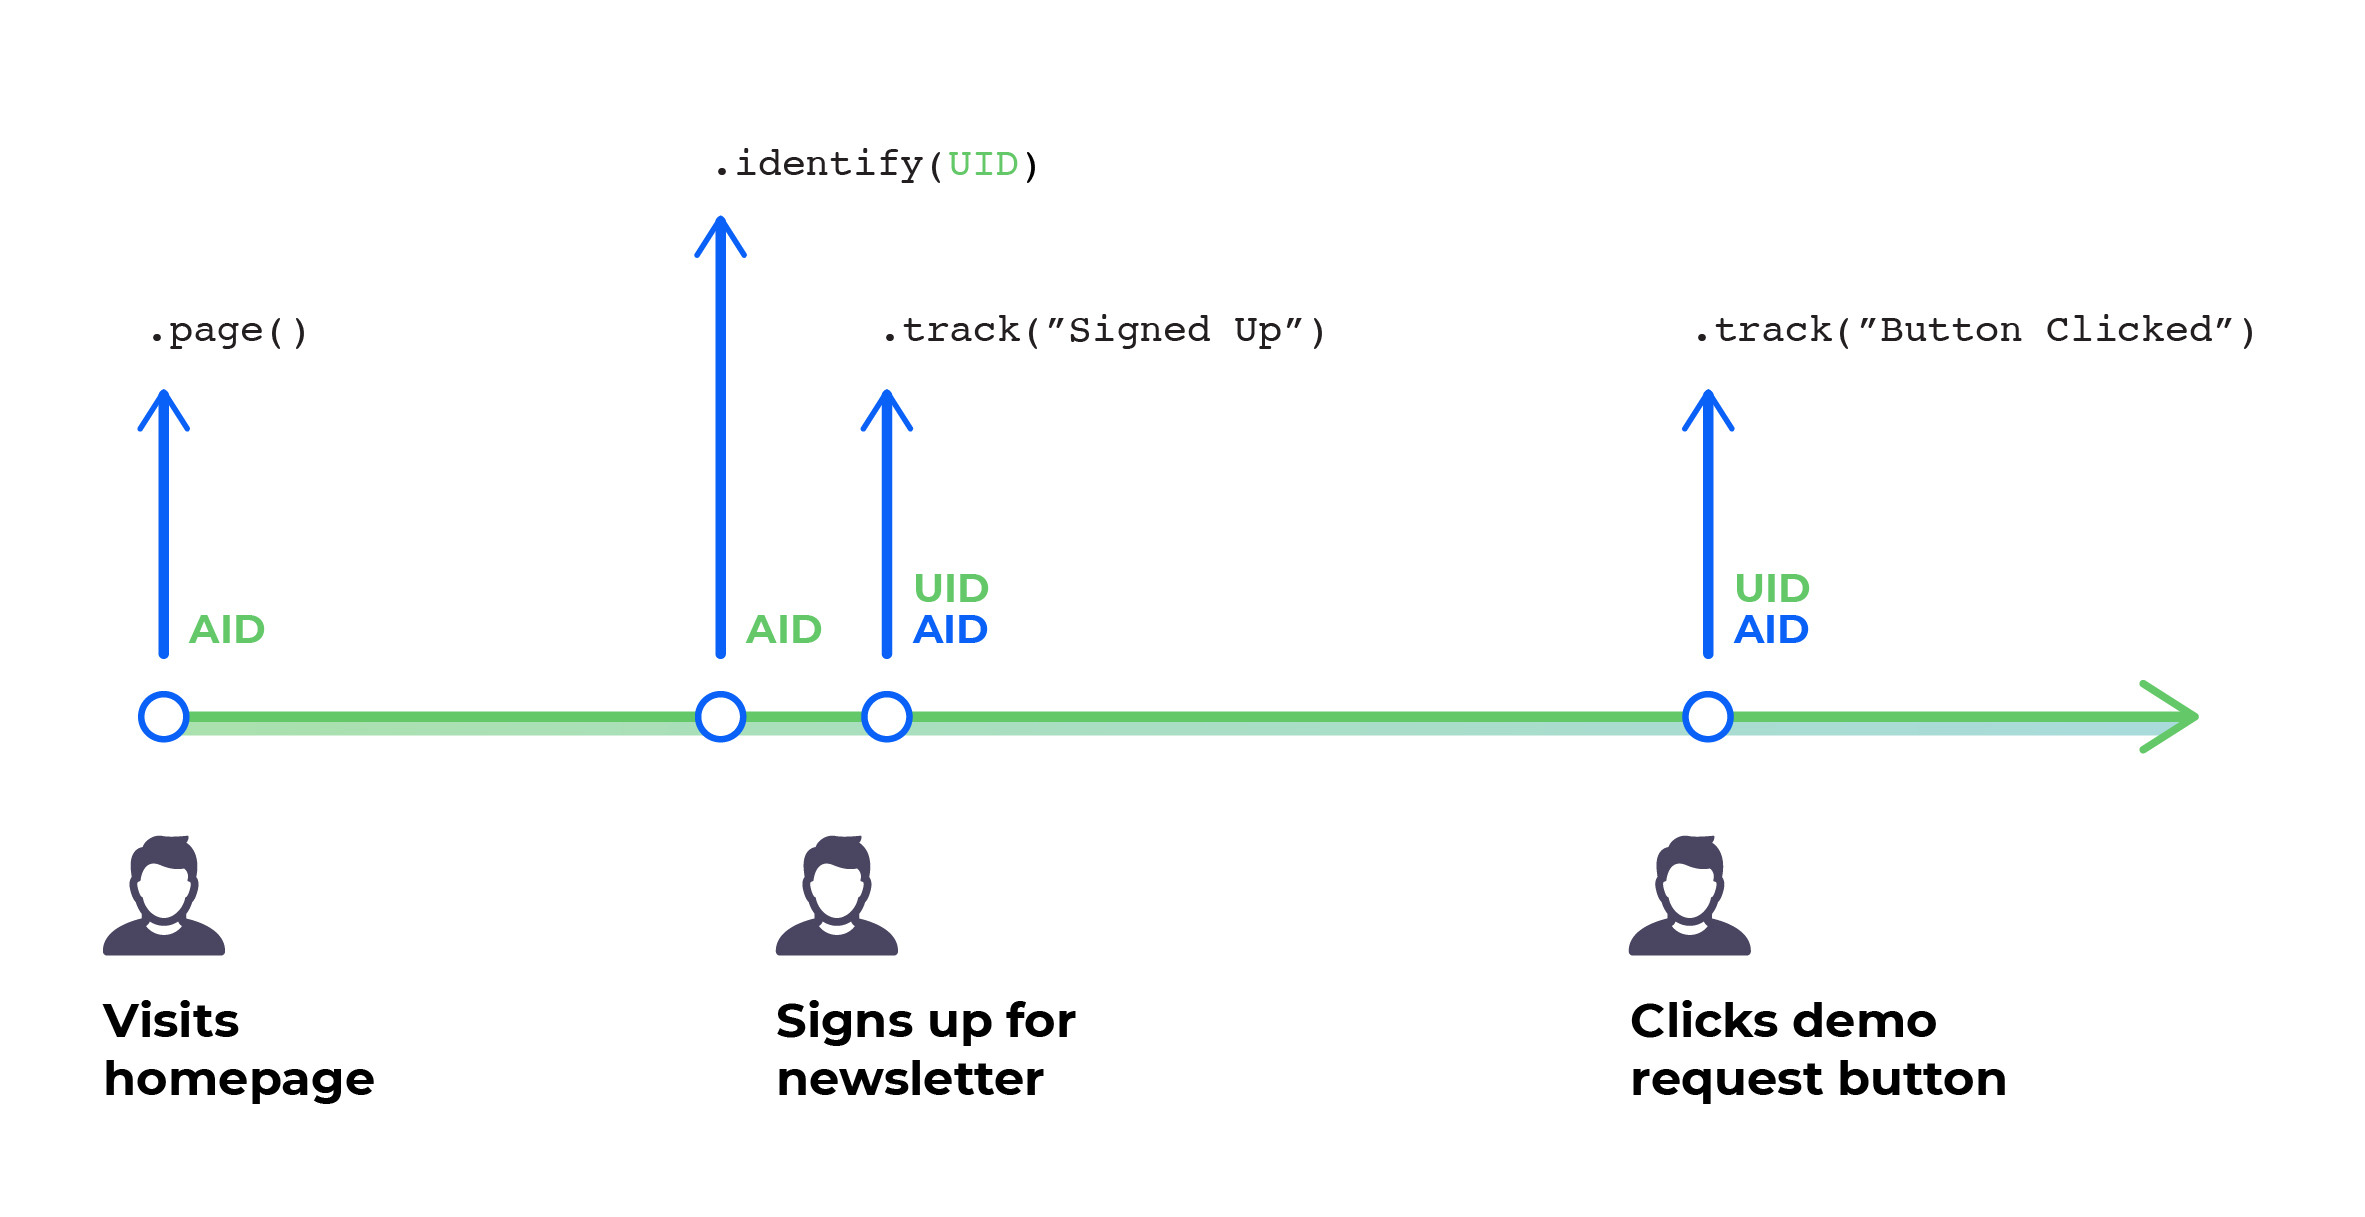
Even before you Identify a user, the Segment library creates an anonymousId for them. This is set by Segment when people visit your website. You’ll also see this as a property in your “Loaded a Page” event.
It’s a 36-character string that is created at random and assigned to a user on their first visit to your website or mobile app. It allows you to relate events that a user has while browsing your website and assign actions over numerous days to the same user by collecting all of the activities with that ID.
Once a person registers for your site or logs into your app, you’ll be able to identify them using Segment’s Identify call and keep their anonymousId in the event payload with the new userId. Your userId should be an ID that does not change. Ideally it's the same as the unique ID that is created for each user in your database. This way, when you send the data to other tools via Segment, the userId remains constant.
Since the anonymousId is generated on the client side and userId is generated on the server side, the alias method acts as a bridge to link the two profiles.
At the end of this step, any anonymous website visits will get linked to the user profile if they sign up for your product.
Most tools act as a destination in Segment, but can’t behave like a source. This step was the hardest to crack and in my opinion was a critical piece of the puzzle to provide a unique and delightful experience for each user.
Customer.io solved this problem for us. Unlike other marketing tools, Customer.io can ingest events and event properties. It also allows you to create custom events based on customer engagement. It came with the ability to segment based on any event, property, and many other criteria that gave us incredible flexibility to tailor-make campaigns to fit our needs.
So we set Customer.io as a destination so both website and product specific data are sent to Customer.io via Segment. At this point we had all data sitting in Customer.io. But Customer.io wasn’t built for you to run deep data analysis. So we set Customer.io also as a source in Segment so customer engagement data are sent to Mixpanel (and other tools) where we can perform detailed analysis.
The only missing piece in Mixpanel and Customer.io for us at this point was the sales data. When did someone turn into an MQL, SQL, or an Opportunity? When did they become a customer?
We chose to use Hubspot since it was simple to get started and the product wasn’t complicated for our needs.
To connect Hubspot with Customer.io, we used Customer.io’s native integration over here. And to send Hubspot’s data to Mixpanel, I chose to use one of my favorite Customer.io capabilities - hitting API endpoints as a step in the campaign workflow.
Every time there was a data update in Customer.io from Hubspot, the next step in the campaign would be to update the same data in Mixpanel via Segment. I chose this route primarily because Hubspot can only act as a destination or as a source to send data to a warehouse. It can’t act as a source to send data directly to another tool. And since I was hitting Segment’s API, I was able to make sure I can send this to other tools if I wanted to.
A much easier route would be to use either Hubspot’s native integration with Mixpanel or Zapier. But going that route meant not sending data via Segment which would make it harder for us to send data to other tools like Intercom for live chat.
Imagine someone signed up for your product from a specific use case page. Wouldn’t it be great if you could send them a detailed help article or a video for that exact use case in your first welcome email?
My thought process was simple. Fogg’s behavior model says three key elements must converge at the same moment for a behavior to occur: Motivation, Ability, and a Prompt.
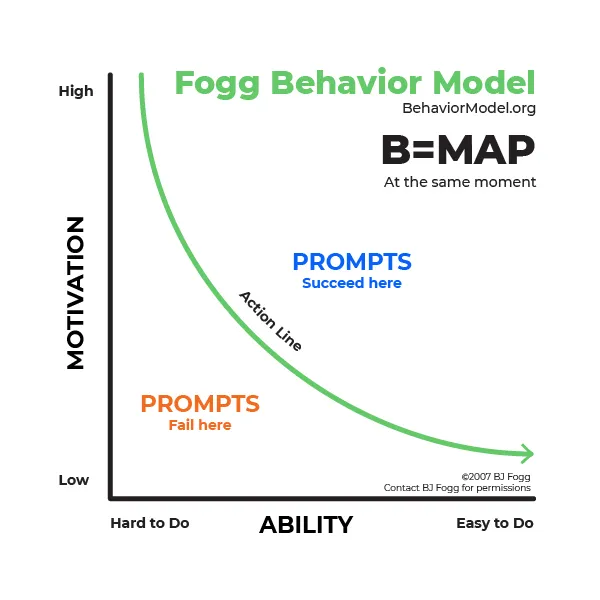
There is motivation when people sign up from a specific use case page. In most scenarios the product team takes care of ensuring people have the ability to use the product for that specific use case without friction. But without the right prompt when their motivation is high, getting people to take action is difficult. And as the motivation drops, no matter how many prompts we throw at them, it becomes harder to get people to perform an action.
To combat this, we created multiple paths for each sign up based on their last page visit before sign up. When we sent them a welcome mail, we included a link to a help article that covered in depth on how to use Zepel for the specific use case.
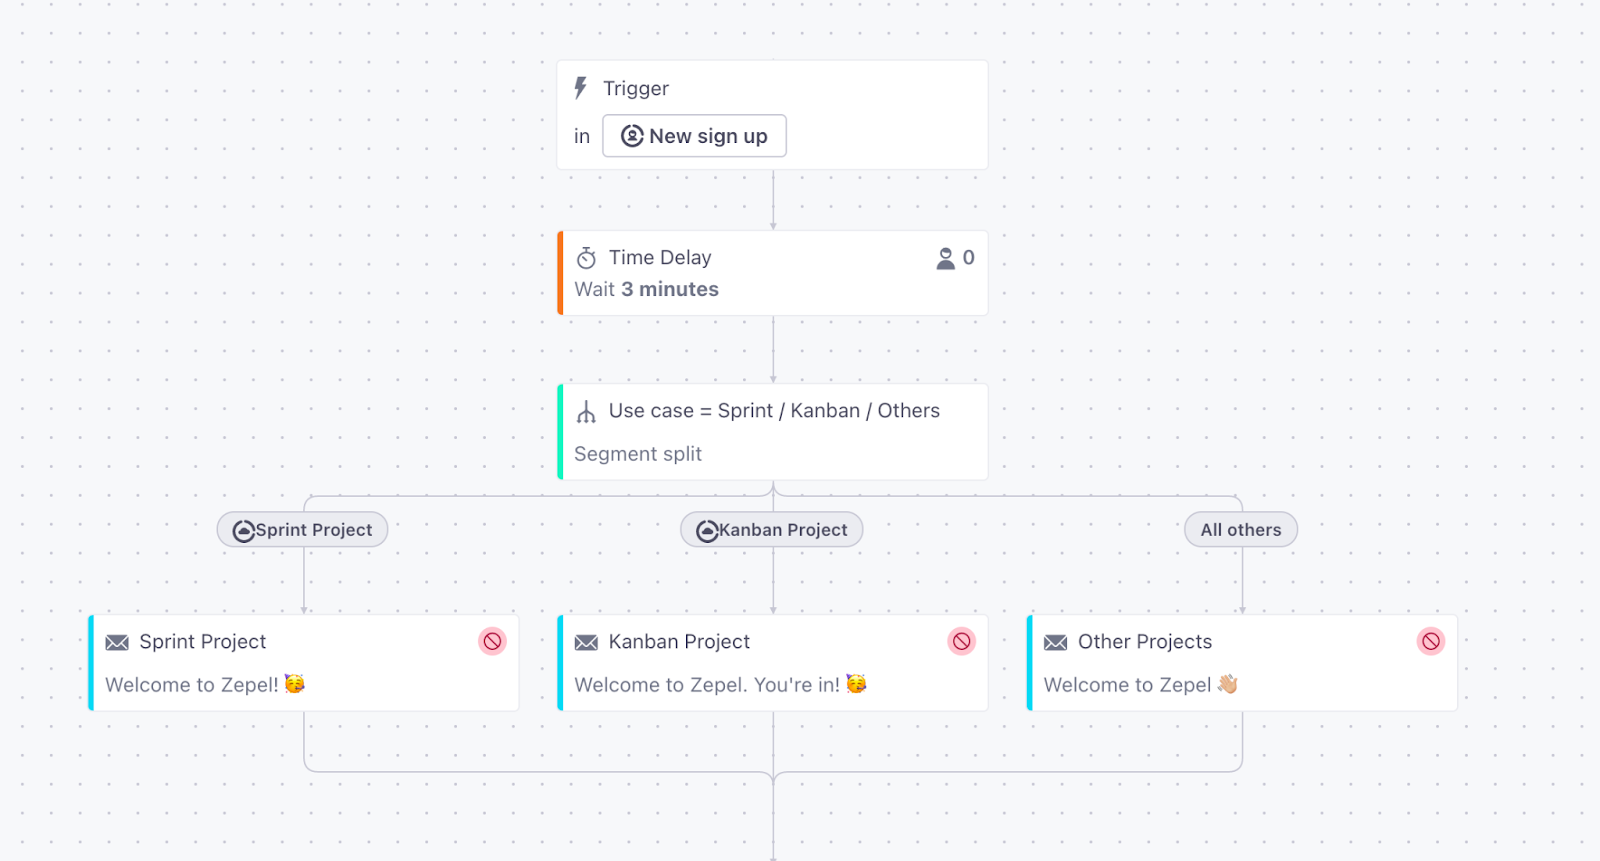
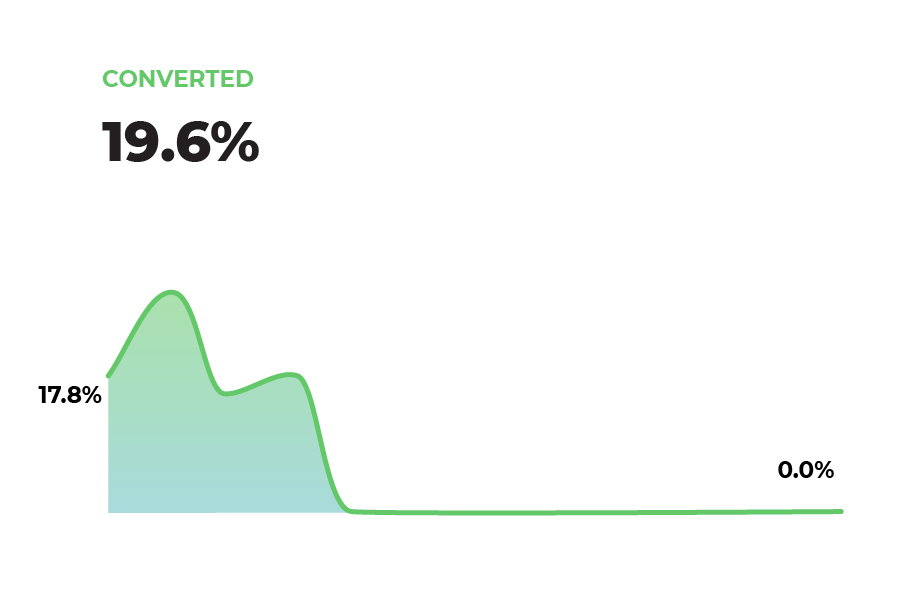
Needless to say the following emails were also related to the use case they signed up for. It wasn’t until the fifth email where we told them of all the other use cases they could explore. This resulted in seeing people activate at close to 20% for a specific segment.
Tip: Instead of email, you could also explore other tools like Pendo to show in-app banners and tool tips.
One of my biggest pet peeves is receiving nurturing emails even after I’ve signed up for the product or after requesting for a demo. That’s possibly the worst experience you can provide to your prospect.
With this setup, it was possible for me to have data on when someone signed up for a newsletter and see if they also signed up for the product or requested a demo.
This way, you can achieve two things:
You easily stop the nurturing email after someone signed up for the product. It’s only a matter of setting an exit criteria in Customer.io.
If someone requested a demo, you would know exactly which use case in the newsletter caught their attention. So you can tailor-make the questions to their use case and go prepared even before you take the first call.
Most large accounts require that extra personal touch. Sometimes they reach out requesting a demo. Many times they sign up for your product and don’t reach out to you at all. And if they’re a right fit for your product, you don’t want to wait till they reach out to you, right?
Since all our customer related data is synced from Hubspot, every time a high-fit customer signed up and actively used our product, an email went to them from the founder that looked like this:
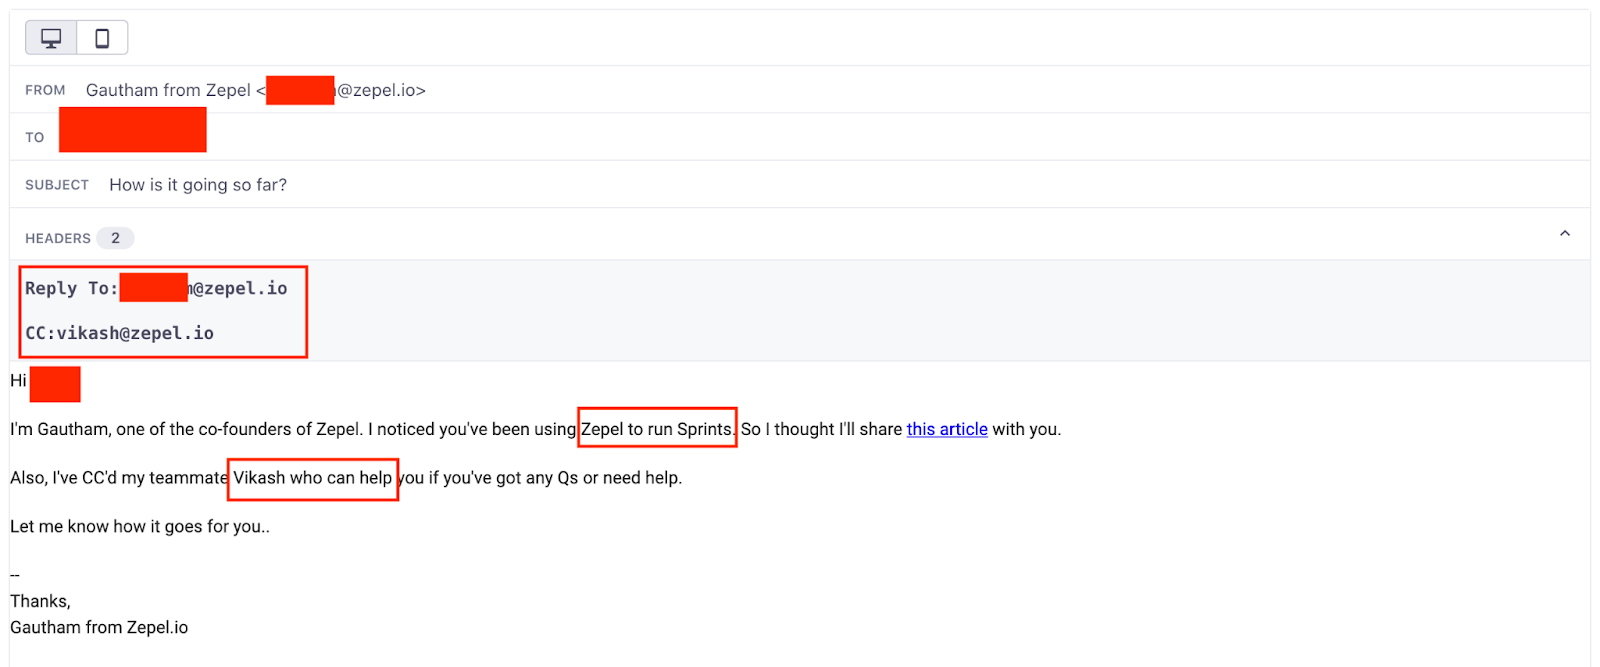
The email body says that it’s from the founder. We personalize it based on the use case they signed up for and share a help article for that use case and CC’d one of the team members saying we’ll help them out to get more bang for buck.
We went one step further, added a 5 minute wait period and sent an automated response from the team member who was CC’d. In the email, we share a link to the use case video and let them know that we created it for their specific use case.
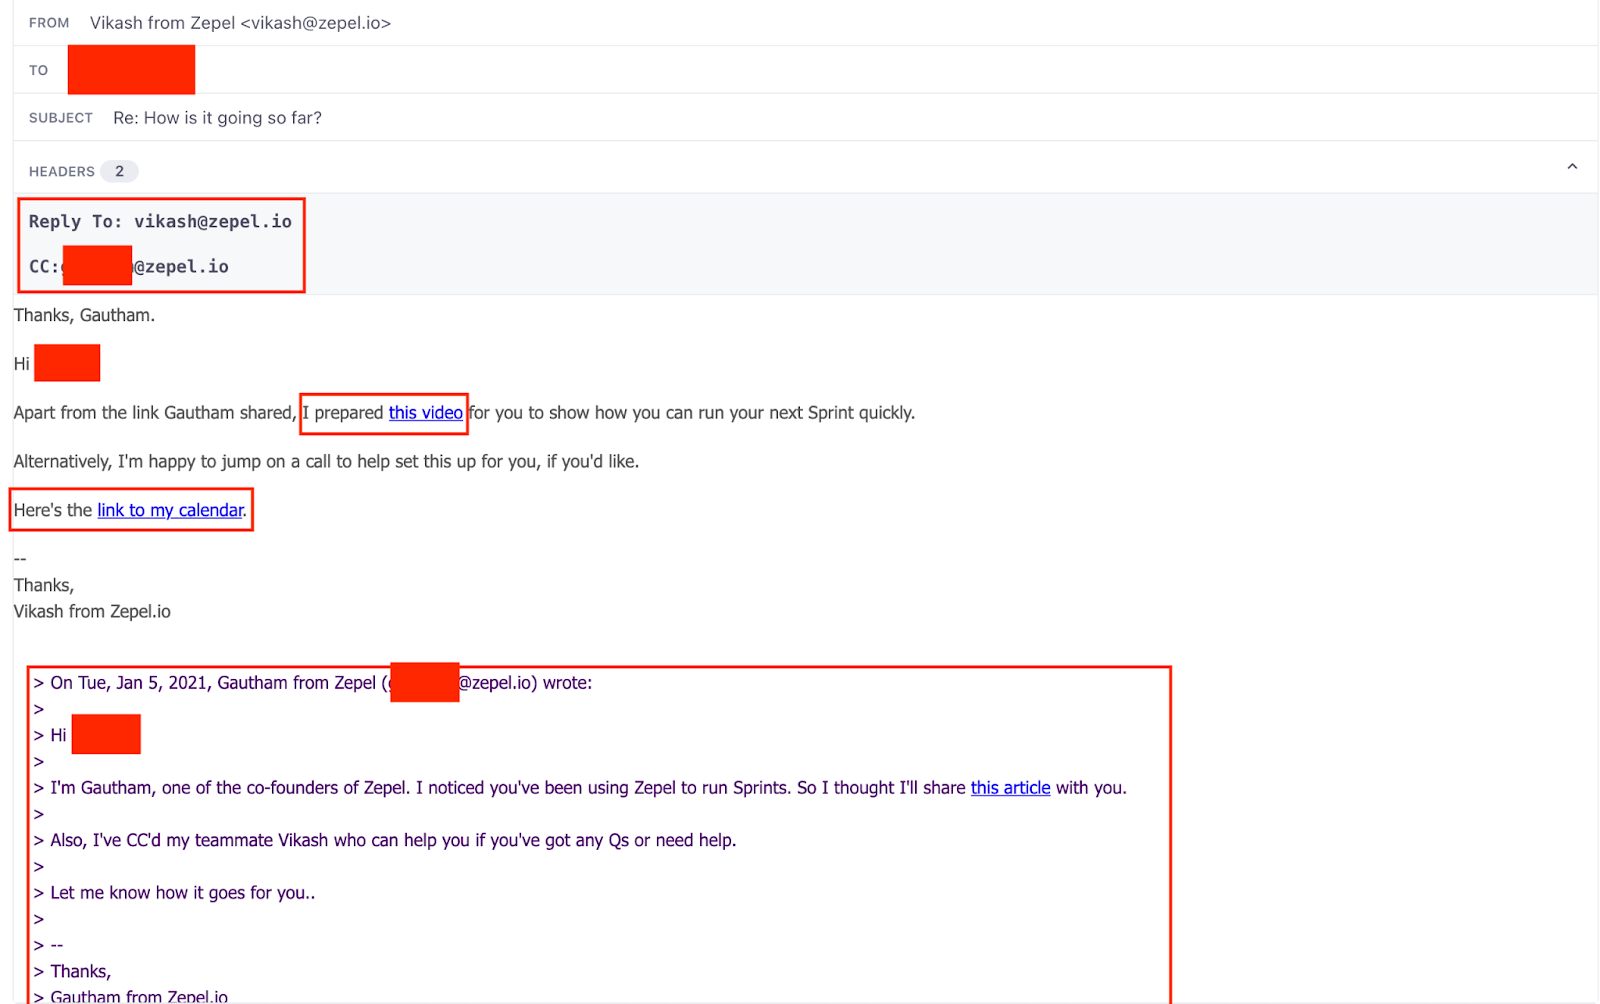
This makes the experience more personal to them.
Result? 40% response rate and 2X more people wanting to get on a call.
Tip: You can build a round-robin assignment for your inbound sales funnel by connecting to your CRM tool if you have several folks in your sales team and put them on CC automatically.
When tracking conversion, the industry standard is to create a funnel for a series of steps, see where there’s a significant drop off, and fix it. But that doesn’t paint the complete picture.
A flaw with this approach is the series of steps that we need to enter comes from human guessing. And more importantly users don’t perform actions in a sequence. They’re mostly random. This means, we miss out on all the other possible ways that people interacted with your brand (website and product) before they dropped off.
My favorite way to track a user’s flow is to use the Sankey Flow diagram which is available in Mixpanel.
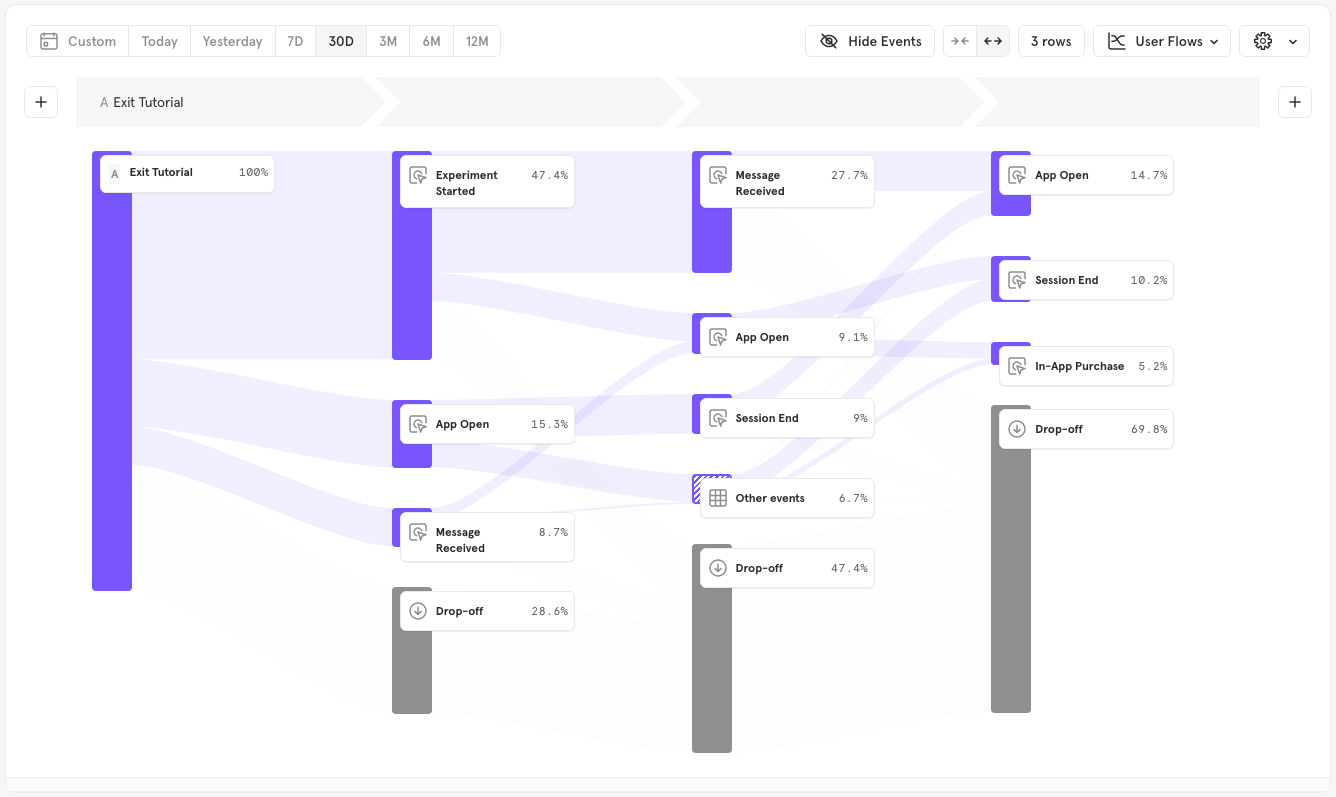
Sample Sankey flow diagram from Mixpanel.
This allows us to do multiple things:
We can take the most frequently used path to our goal (In-app Purchases in this case) and remove friction. Tip: Whenever a customer makes a purchase, send an event via Segment to register that in all your tools.
See who dropped off at which step, view what caused them to drop off in a tool like FullStory (which can also be connected via Segment), and fix the flow.
Track the correlation between each step in the flow to our end goal to understand the impact of each step to the goal. When looking at data, most teams say, “people who performed X converted” or “people who converted did X”. They make the mistake of not considering people who performed X but didn’t convert, nor do they take into consideration the people who converted without performing X. My favorite model is by using Phi’s coefficient since it takes a multi-dimensional approach. I’ve written about this in detail in my blog over here. Fair warning, correlation does not mean causation.
If you’re running an upsell campaign, you can see how customers behave with your content and plan for how to re-engage them.
Mixpanel allows us to segment and filter user flows based on properties and events. This allows us to see how user flows change for each marketing campaign. And since we can also personalize onboarding based on marketing campaigns, we can see which touch point in their journey doesn’t resonate well with our users.
Since we’ve got all the data flowing into Mixpanel, you can also see:
What content leads to sign ups
What content and campaigns do MQLs/SQLs engage in
With a single source of truth for all your customers and uniform data sitting across all your tools, building incredibly targeted and personalized campaigns is a lot easier where the only limit is our imagination.

Our annual look at how attitudes, preferences, and experiences with personalization have evolved over the past year.