Engineers & Developers

How to build a holistic tracking implementation with Analytics React Native 2.0

Analytics React Native 2.0 makes it easier than ever to customize your tracking implementation to meet the bespoke requirements of your app.

Sep 19, 2022

By Alan Charles


Hi I’m Alan, a software engineer at Twilio Segment. I’ll be walking you through a complete implementation of Analytics for React Native using this app.

Segment Shop

This is an example of a real-world E-Commerce application that sells skateboard decks. We decided to use real products designed and produced by our beloved colleague, Brandon Sneed. In this app, you can walk through a typical E-Commerce purchase flow complete with a tracking implementation that follows Segment’s E-Commerce spec. 

infographic-1
sample shop

If you would like to follow along, you can use the starter app found here. If you would like to peruse or follow along with a completed implementation, checkout the finished app.

Overview 

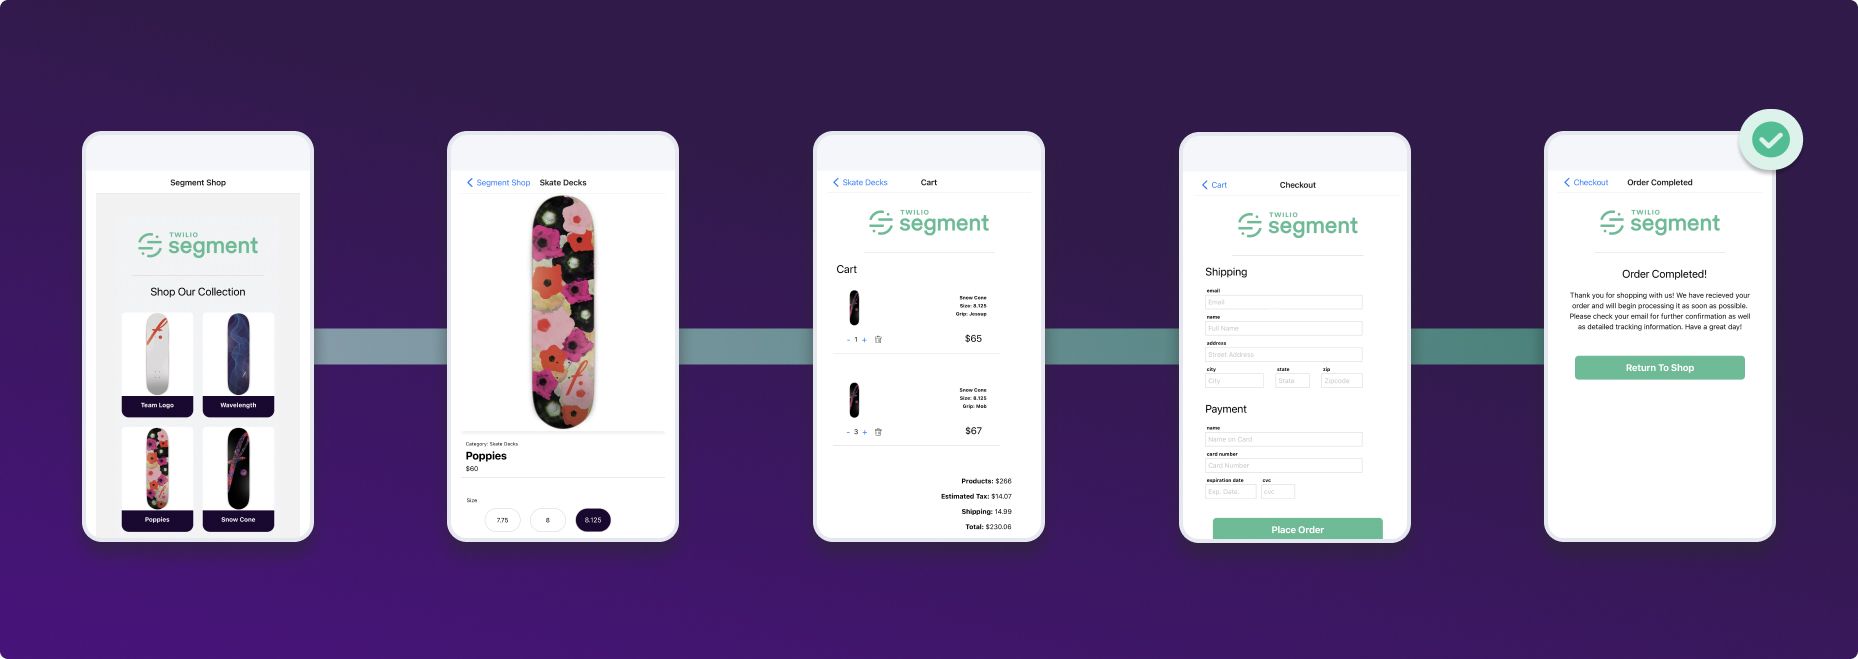
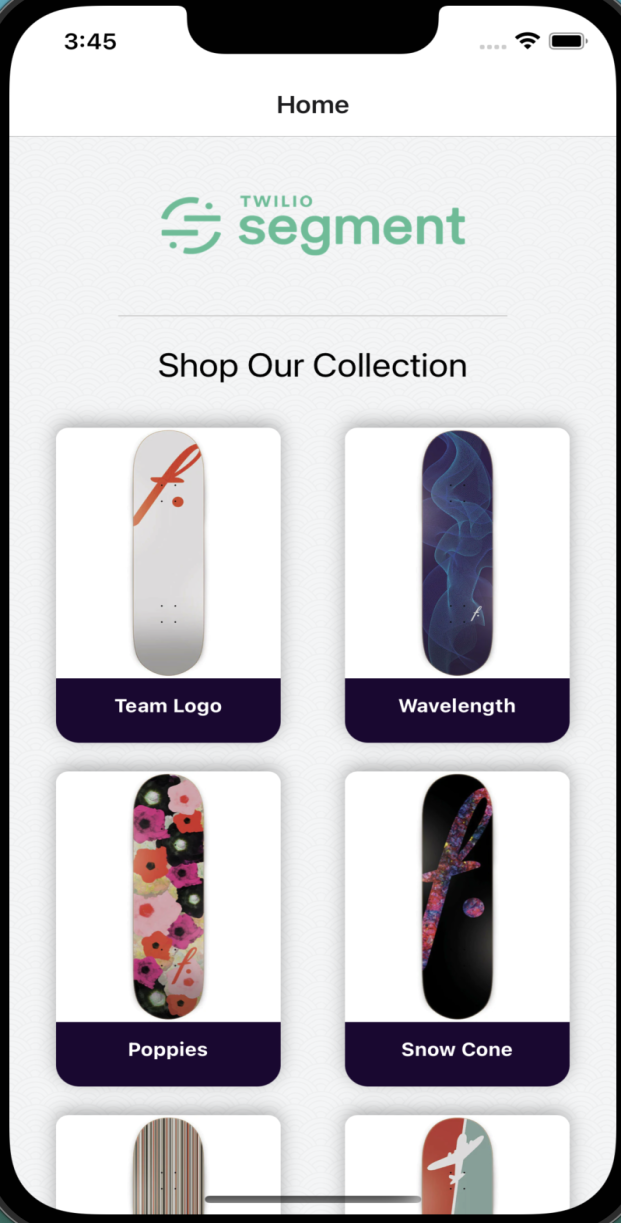
We will start with a functional E-Commerce app built in React Native that does not have tracking implemented. From there,  we will walk through a complete tracking implementation with the help of Analytics React Native 2.0, Protocols, and a Tracking Plan. The new architecture implemented in Analytics React Native 2.0 will make it possible for us to add IDFA and advertisingId collection consent without incorporating another third-party dependency and incorporate an analytics hook to track events throughout the application. Finally, with the help of the Firebase Destination Plugin, we will send the events tracked to Firebase.

Resources

Background

I have been with Segment for a little over three years now. I have helped dozens of companies implement, improve, and sometimes completely reimagine their mobile analytics implementations. In that time, I have seen just how quickly things can change in the mobile analytics landscape and how important it is to have a comprehensive understanding of your tracking goals/needs before you begin your implementation. To that end, the following series of blog posts will show you how you can leverage Segment’s new mobile architecture by applying it to a few relatively standard, real-world use cases in a React Native application. 

Introducing Analytics React Native 2.0

Over the course of the past year we have completely reimagined our mobile libraries. There were a number of reasons for this but the biggest one was customizability. Every customer has their own bespoke needs and we strongly believe that our analytics libraries should reflect and support this reality. 

With this in mind, we decided to take a flywheel approach to the new libraries. The idea is that by keeping the core library small and lightweight, customers can “plugin” to it when and where they need. To accomplish this we decided to break down the lifecycle of an analytics event into simple components. You can think of this as a timeline of when an analytics event is created until the time it leaves a device. We came up with the following: 

  • Before: What happens before the event is created. For instance, has consent been given by the user? 

  • Enrichment: Data that needs to be added to the event after it has been invoked. An example of this would be adding contextual data if certain criteria have been met. 

  • Destination: The destination of the event, either Segment or a third party SDK (Device Mode integrations). 

  • After: What happens after the event lifecycle. This includes clean up operations and things of that nature.

Approaching an analytics event this way makes it much easier to conceptualize your entire implementation and gives you more control over what and when you track. This has become increasingly important as Apple and Google continue to restrict tracking anything useful without a user’s consent. 

Getting Started

To get started, make sure you have cloned a copy of the segment/analytics-react-native-ecommerce-samples repository and have run the necessary build/startup commands:

// from project root cd starter-app-ecommerce && yarn cd ios && pod install

Before we do anything else with this app let’s set up a new React Native Source in your  Segment workspace. 

  1. Go to Connections -> Sources -> Add Source

  2. Search for React Native

  3. Fill out the necessary fields and Add Source

You should now have a new Source!

Tracking Plans

This is technically all you need to get started with your implementation. However, as mentioned earlier, the best analytics implementations are planned. While this may seem like a big lift in the beginning, it will make your life much easier as your analytics needs start to scale. To do this, we’re going to add a Tracking Plan*.

*Protocols and Tracking Plans are a Business Tier add-on. However, the steps above are still a helpful exercise to make a plan with Google Sheets or Excel for your own tracking purposes if you are not currently Business Tier.

If you don’t have access to Protocols or already know how to implement a Tracking Plan, feel free to skip this section. The full Segment Shop Tracking Plan can be found here in JSON format, which can be used to create a tracking plan via our API docs.

  1. Start by selecting Schema in your React Native Source

  2. Next, select Connect Tracking Plan

  3. Finally, select New Tracking Plan

Before we begin adding events to our tracking plan, let’s take a step back and think about what we need. Segment’s eCommerce Spec is a great place to start thinking about the events we’d like to track and the properties we need to associate with a particular event. You should also consider where you need to send event data as different tools have different requirements. For the sake of this demo, we are ultimately going to send data to Firebase and Braze. We can start by running the app. 

yarn ios
yarn android

You should now have successfully built the app in the emulator of your choice:

sample-app
Sample app

The home page of our Segment Shop is simply a list of skateboards designed by one of our very own engineers, Brandon Sneed. This fits perfectly with the Product List Viewed event in the eCommerce Spec so let’s add that to our tracking plan. 

Product List Viewed
Product List Viewed Event

Once you’ve added the event and its associated properties, click Add Event. We are going to do this for the rest of the events we’ll need for our shop. 

Tracking Plan
Sample Tracking Plan

Implementing Analytics React Native 2.0

Now that we have a complete tracking plan for our app, we can start to implement Segment’s Analytics for React Native library. To get started, add the following packages:

yarn add @segment/analytics-react-native @segment/sovran-react-native @react-native-async-storage/async-storage cd ios && pod install

You may want to rebuild your app to make sure everything is compiling correctly. Next, in App.tsx you will need to import the library and set up the client configuration. 

import { createClient, AnalyticsProvider } from '@segment/analytics-react-native'; ... const segmentClient = createClient({ writeKey: 'WRITE_KEY' });

The Segment Client has a number of useful configuration options. You can find more about those here. For this project, we’ll use the following: 

const segmentClient = createClient({ writeKey: 'WRITE_KEY', trackAppLifecycleEvents: true, collectDeviceId: true, });

The last thing we need to do in App.tsx is wrap the app in the analytics provider. This uses the Context API and will allow access to the analytics client anywhere in the application. 

const App = () => { const Stack = createNativeStackNavigator(); return ( <AnalyticsProvider client={segmentClient}></AnalyticsProvider> ) };

IDFA & advertisingId Collection

Rebuild the app and you will now start seeing Application Lifecycle Events in your Source Debugger! Before we start implementing custom track events, we’re going to add enrichment plugins to request tracking permission from the user on both Android and iOS devices.

iOS

yarn add @segment/analytics-react-native-plugin-idfa cd ios && pod install

In Info.plist add the following:

<key>NSUserTrackingUsageDescription</key> <string>We use your data to personalize your experience</string>

In App.tsx 

import { IdfaPlugin } from '@segment/analytics-react-native-plugin-idfa'; ... segmentClient.add({ plugin: new IdfaPlugin() });

Android

yarn add @segment/analytics-react-native-plugin-advertising-id

In app/build.gradle

dependencies { .... implementation "com.google.android.gms:play-services-ads-identifier:18.0.1" }

In AndroidManifest.xml 

<uses-permission android:name="com.google.android.gms.permission.AD_ID"/> <application. <meta-data android:name="com.google.android.gms.ads.APPLICATION_ID" android:value="ca-app-pub-3940256099942544~3347511713"/>

All that’s left to do is implement the track events from the tracking plan. An easy one to start with is the Product List Viewed event we covered earlier. 

In Home.tsx  add the {useEffect} hook to your existing React import and import the useAnalytics hook.

Import React, {useEffect} from ‘react’; import { useAnalytics } from '@segment/analytics-react-native';

Add the useAnalytics hook and set up the track call inside the useEffect method to track the Product List Viewed event when the screen is rendered.

export const Home = ({navigation}: HomeNavProp) => { const {track} = useAnalytics(); useEffect(() => { let trackProperties = { category: 'Skate Decks', products: ProductData, }; track('Product List Viewed', trackProperties); }); ... };

As an exercise, you can go through the rest of the Tracking Plan and implement the remaining tracking events. If you want to see a final version, checkout the final-app-ecommerce in the same repository. 

Destination Plugins 

Destination Plugins make it possible to send your events to analytics tools directly from the device. This is handy when you want to integrate an SDK that either does not offer a server-side endpoint or has additional functionality you would like to use (in-app messaging, push notifications, etc.).

In this example we are going to add the Firebase Destination Plugin as it is one of the most popular plugins we support. Since the @react-native-firebase SDK requires adding initialization code to native modules for both iOS and Android builds, we will only walk through Firebase setup for iOS builds. You can find the Android implementation steps here

To get started, add Firebase as a Destination in your Segment workspace. Next, go to the Firebase console and create a new iOS project. Follow steps 1 & 2 for iOS installation. Once you’ve added your GoogleService-Info.plist file, add the dependencies. 

1. Add dependencies

yarn add @segment/analytics-react-native-plugin-firebase @react-native-firebase/app @react-native-firebase/analytics

* you may have to add the following to `ios/podfile`

platform :ios, '11.0' install! 'cocoapods', :deterministic_uuids => false pod 'Firebase', :modular_headers => true pod 'FirebaseCore', :modular_headers => true pod 'FirebaseCoreInternal', :modular_headers => true pod 'GoogleUtilities', :modular_headers => true

2. Add pods

cd ios && pod install

3. Add Plugin to Segment Client

import { FirebasePlugin } from '@segment/analytics-react-native-plugin-firebase'; ... segmentClient.add({plugin: new FirebasePlugin()});

You should now be able to rebuild your app and successfully send your events to Firebase. It can take anywhere from 30 minutes to 24 hours for your data to start showing in your Firebase console when you first connect.

Enriching a Destination Plugin

Destination plugins contain an internal timeline that follows the same process as the analytics timeline, enabling you to modify/augment how events reach the particular destination. For example, if you only wanted to send a subset of events to Firebase to initially test out the integration, you could sample the Segment events by defining a new Plugin as per the following:

import { Plugin, PluginType, SegmentEvent, } from '@segment/analytics-react-native'; export class Sample extends Plugin { // Note that `type` is set as a class property // If you do not set a type your plugin will be a `utility` plugin (see Plugin Types above) type = PluginType.before; execute(event: SegmentEvent) { const random_number = this.randomIntFromInterval(1, 2); if (random_number % 2 === 0) { return event; } } randomIntFromInterval(min: number, max: number) { return Math.floor(Math.random() * (max - min + 1) + min); } }

Add the plugin to the Firebase plugin

import { FirebasePlugin } from '@segment/analytics-react-native-plugin-firebase'; import {Sample} from './Sample'; ... const firebase_plugin = new FirebasePlugin(); const sample = new Sample(); firebase_plugin.add(sample); segmentClient.add({firebase_plugin});

Conclusion

We have now completed a simple yet holistic tracking implementation with Analytics React Native 2.0. With the help of the eCommerce Spec and Protocols, we have built a tracking plan to standardize the events and data being tracked. The new architecture implemented in Analytics React Native 2.0 made it possible to add IDFA and advertisingId collection consent without incorporating another third-party dependency and incorporate an analytics hook to track events throughout the application. Finally, with the help of the Firebase Destination Plugin, we sent events to Firebase.

Analytics React Native 2.0 makes it easier than ever to customize your tracking implementation to meet the bespoke requirements of your app. Now that the foundations of the analytics implementation are complete, customizing it over time or as you scale will typically be as straightforward as adding a few dependencies and updating your tracking plan.

The State of Personalization 2023

Our annual look at how attitudes, preferences, and experiences with personalization have evolved over the past year.

Get the report
SOP 2023

The State of Personalization 2023

Our annual look at how attitudes, preferences, and experiences with personalization have evolved over the past year.

Get the report
SOP 2023

Share article

Want to keep updated on Segment launches, events, and updates?

We’ll share a copy of this guide and send you content and updates about Twilio Segment’s products as we continue to build the world’s leading CDP. We use your information according to our privacy policy. You can update your preferences at any time.