Growth & Marketing

How to optimize page performance using heatmaps

This recipe shows you how to use heatmaps to optimize the performance of your webpages. By seeing the areas of pages that users are engaging with most often, you can determine where to invest your time and energy.

Jun 12, 2020

By Calvin French-Owen


You can significantly improve your site’s conversion by treating visitors as distinct people.

Each visitor has their own backstory. Perhaps some have already purchased from you, and perhaps others are here for the first time. Further, some may come from a Facebook ad, and others through word of mouth.

These differences often materially affect the visitor’s behavior on your site. So, a common growth tactic is to split your landing pages into multiple, with each catering to a distinct persona. This is one of the quickest ways to improve your site’s conversion.

Here’s a quick example:

User A has never heard of you. They clicked a Facebook ad hoping to learn more about your 50% discount.

User B has bought from you four times. They always order the same thing every 4-6 weeks.

Step 1: Get up to speed on heatmaps

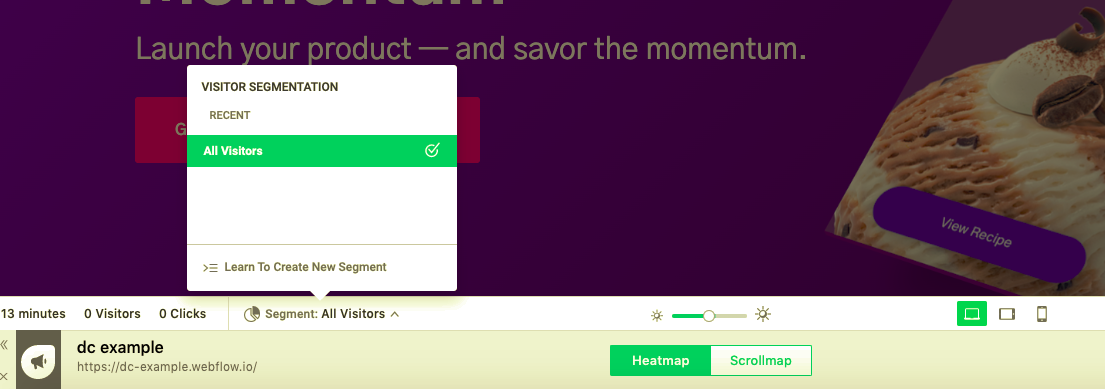
The journey to customizing landing pages starts with heatmaps, which help identify the on-site behavior of different personas.

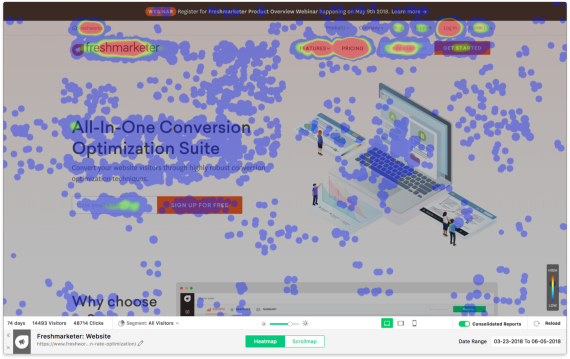
A heatmap is a visualization that shows where people click on a page and how far down they’ve scrolled. By default, heatmap tools aggregate clicks from all personas without distinguishing between them. Unaddressed, this leads to incorrect growth conclusions and website optimizations that move your site in the wrong direction. Most growth marketers don’t account for this.

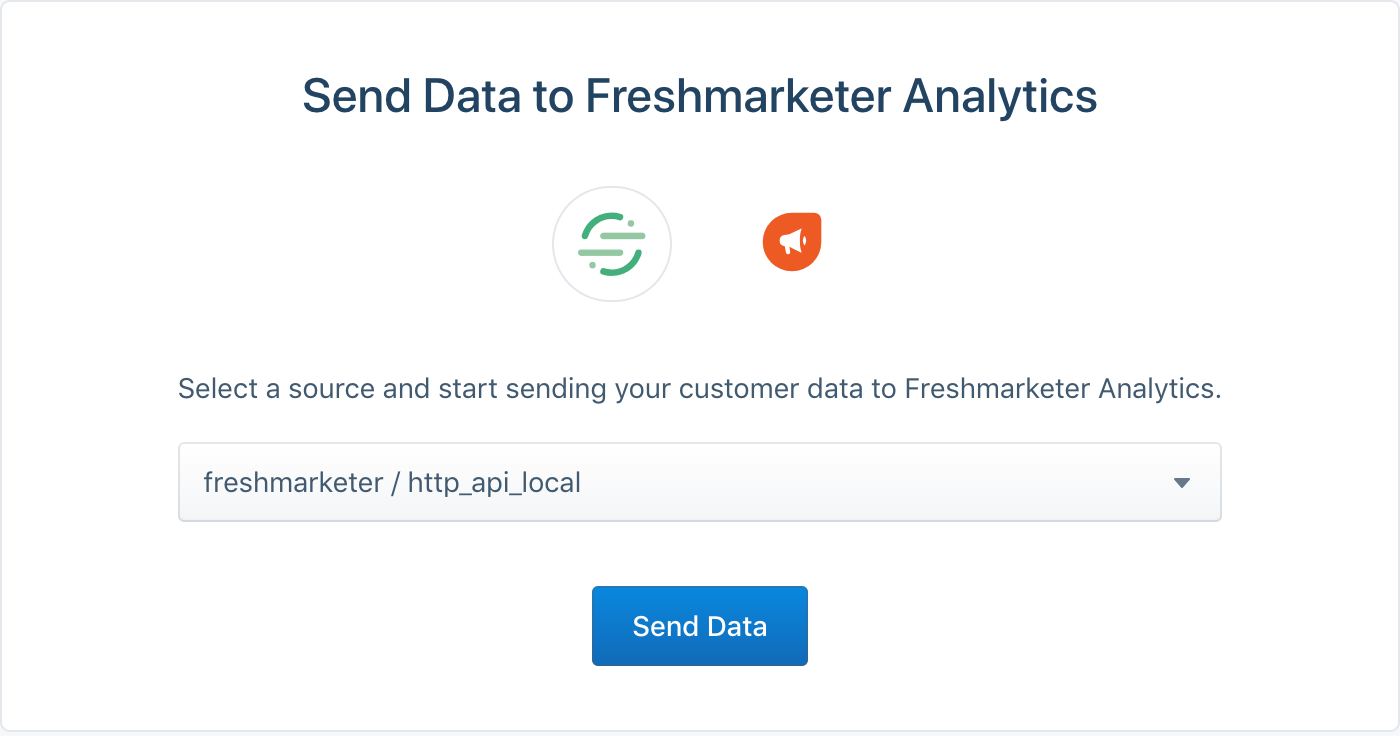
This is where Segment steps in.

Segment automatically identifies your chosen personas then pipes their segmented data into your favorite heatmap tool. This means you can separately assess the click behavior of each persona. Then, using that data, you can split one page into multiple — with each maximally appealing to a particular persona.

Let’s learn how to do this properly. Along the way, we’ll share important growth marketing insights.

Step 2: Segment your audience

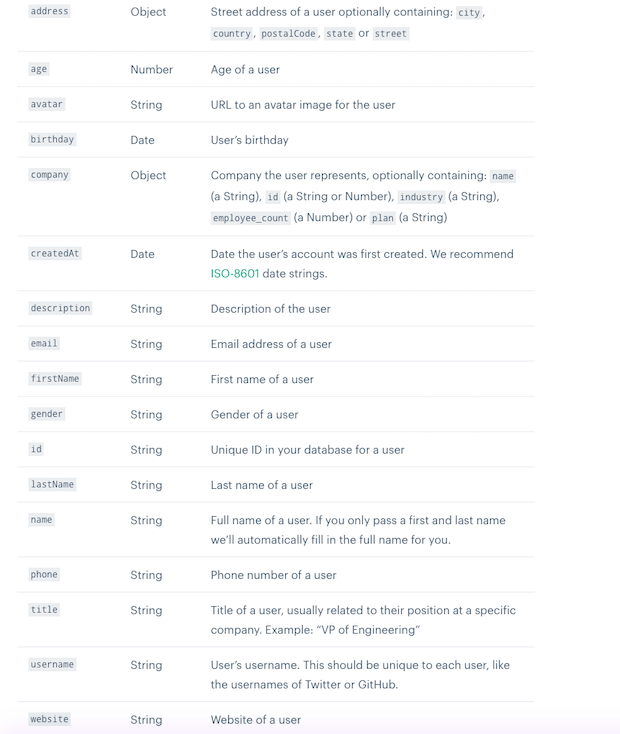
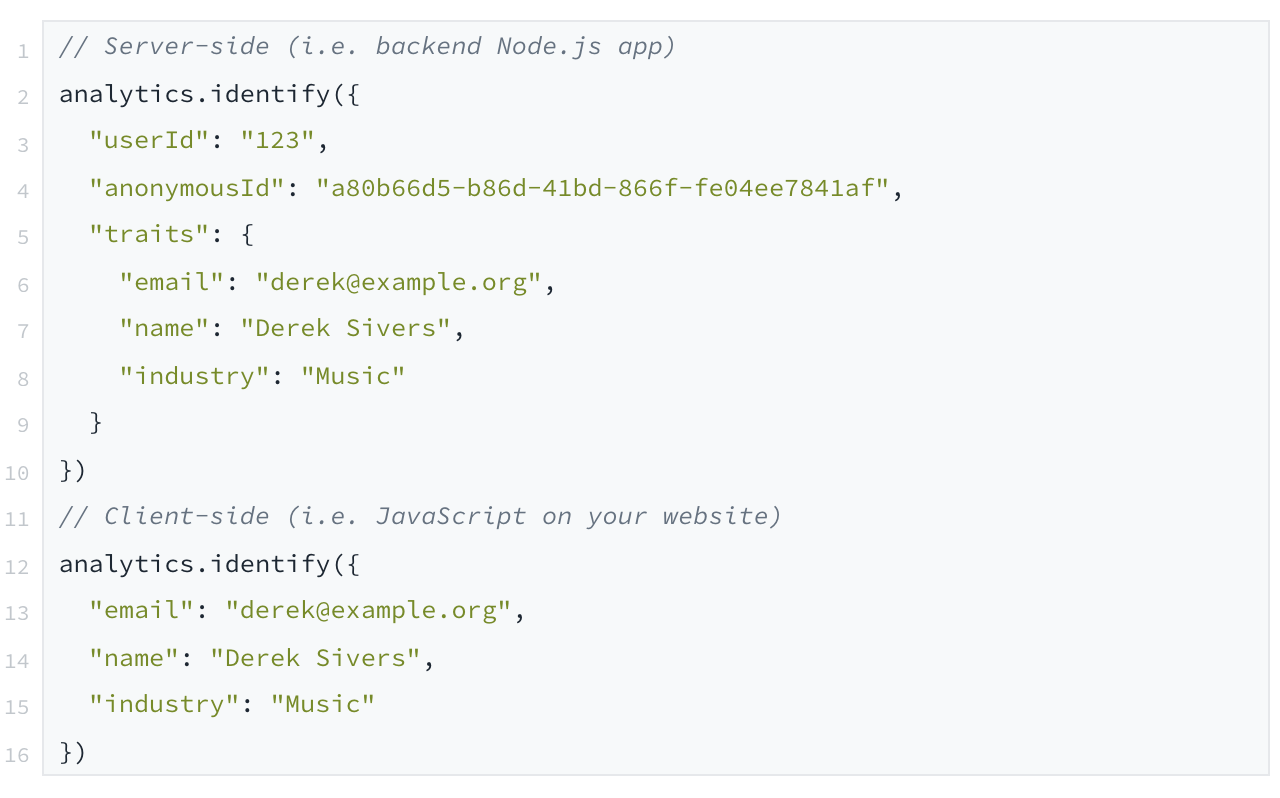
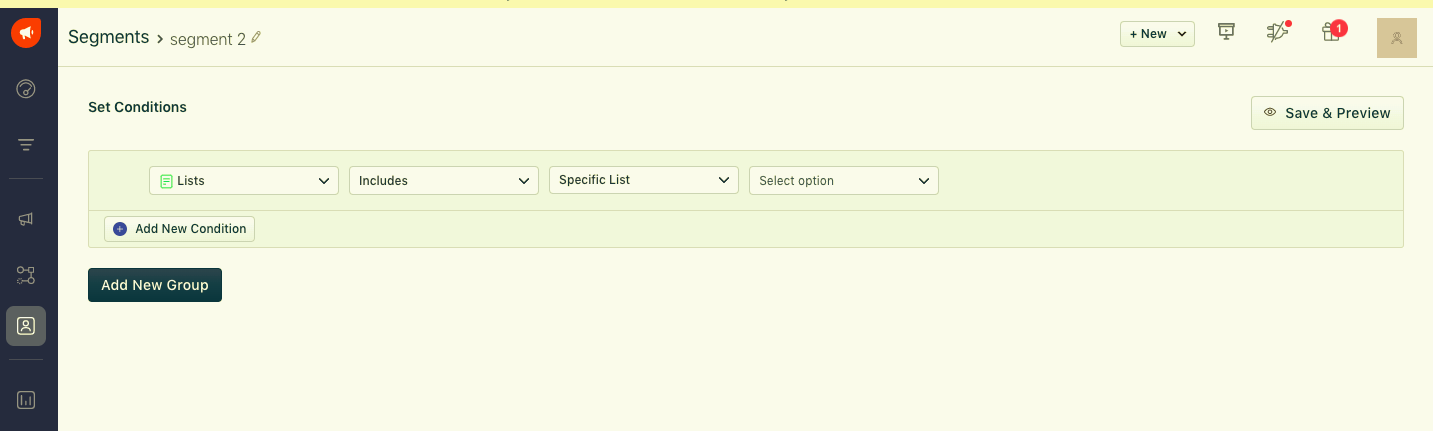
Using Segment Personas, you can segment your traffic and users using any criteria you care about.

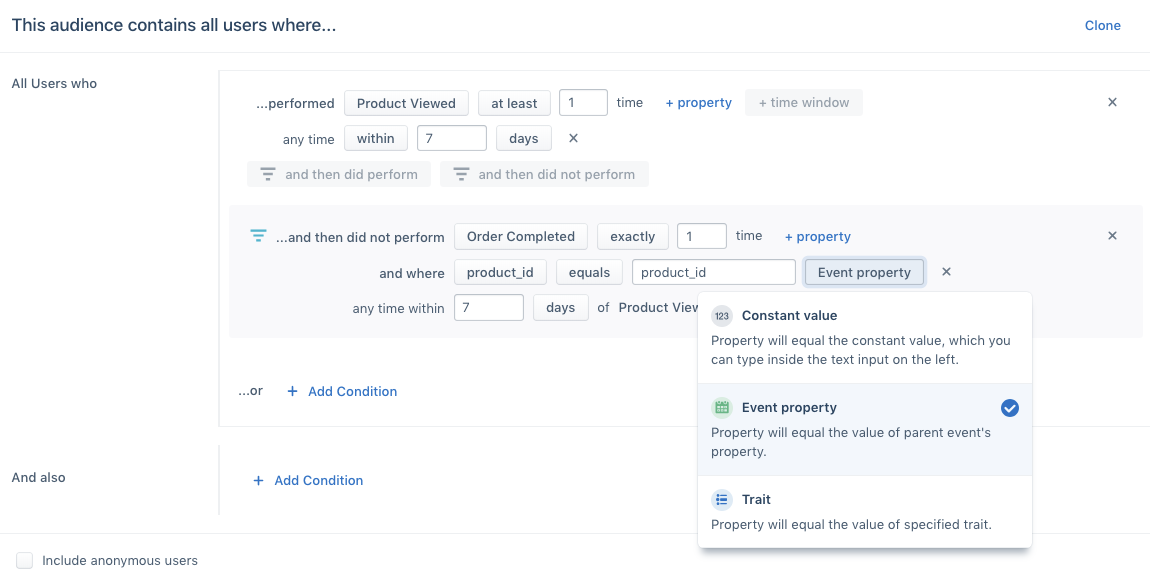
Two examples: 1. Segmenting by location. If users behave differently based on location, you’ll want to separate them out accordingly. For example, perhaps you only ship certain products to specific regions, or maybe certain countries have different cultural and language expectations. 2. Segmenting by behavior. The visitor/user events you already track within Segment can also be used to create Personas. Let’s take a look at that below.

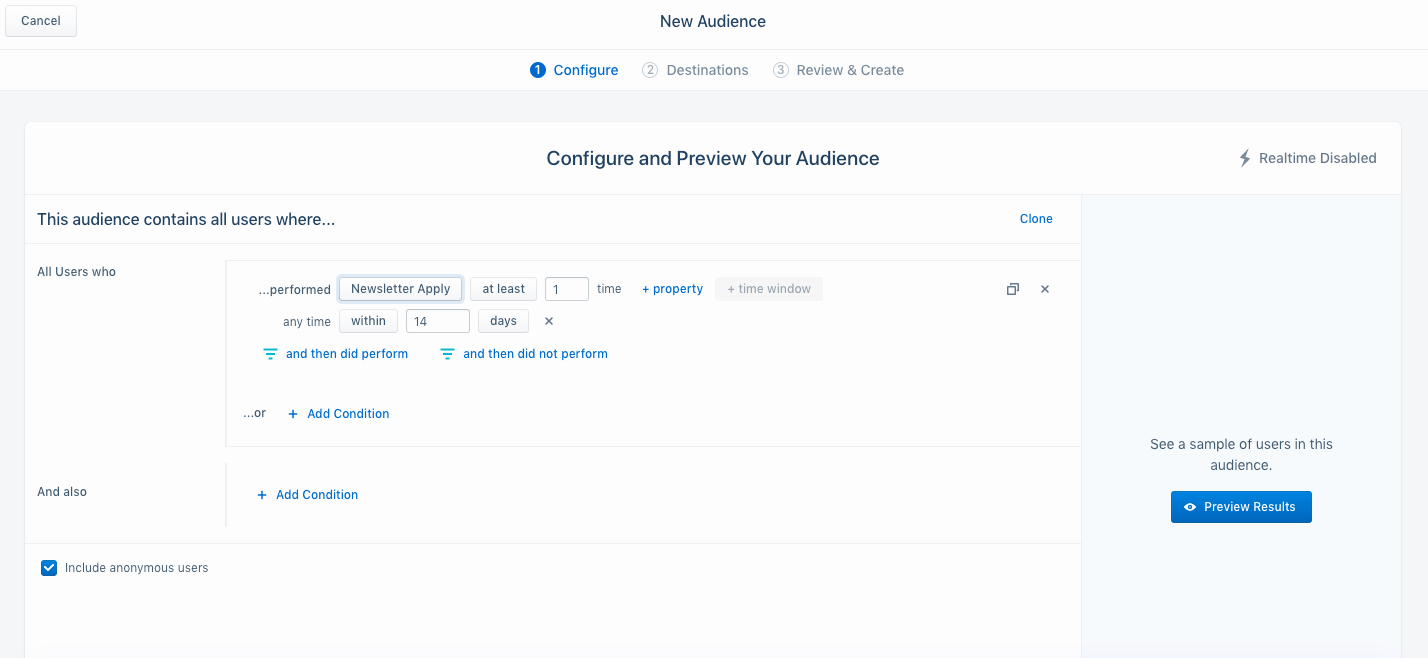
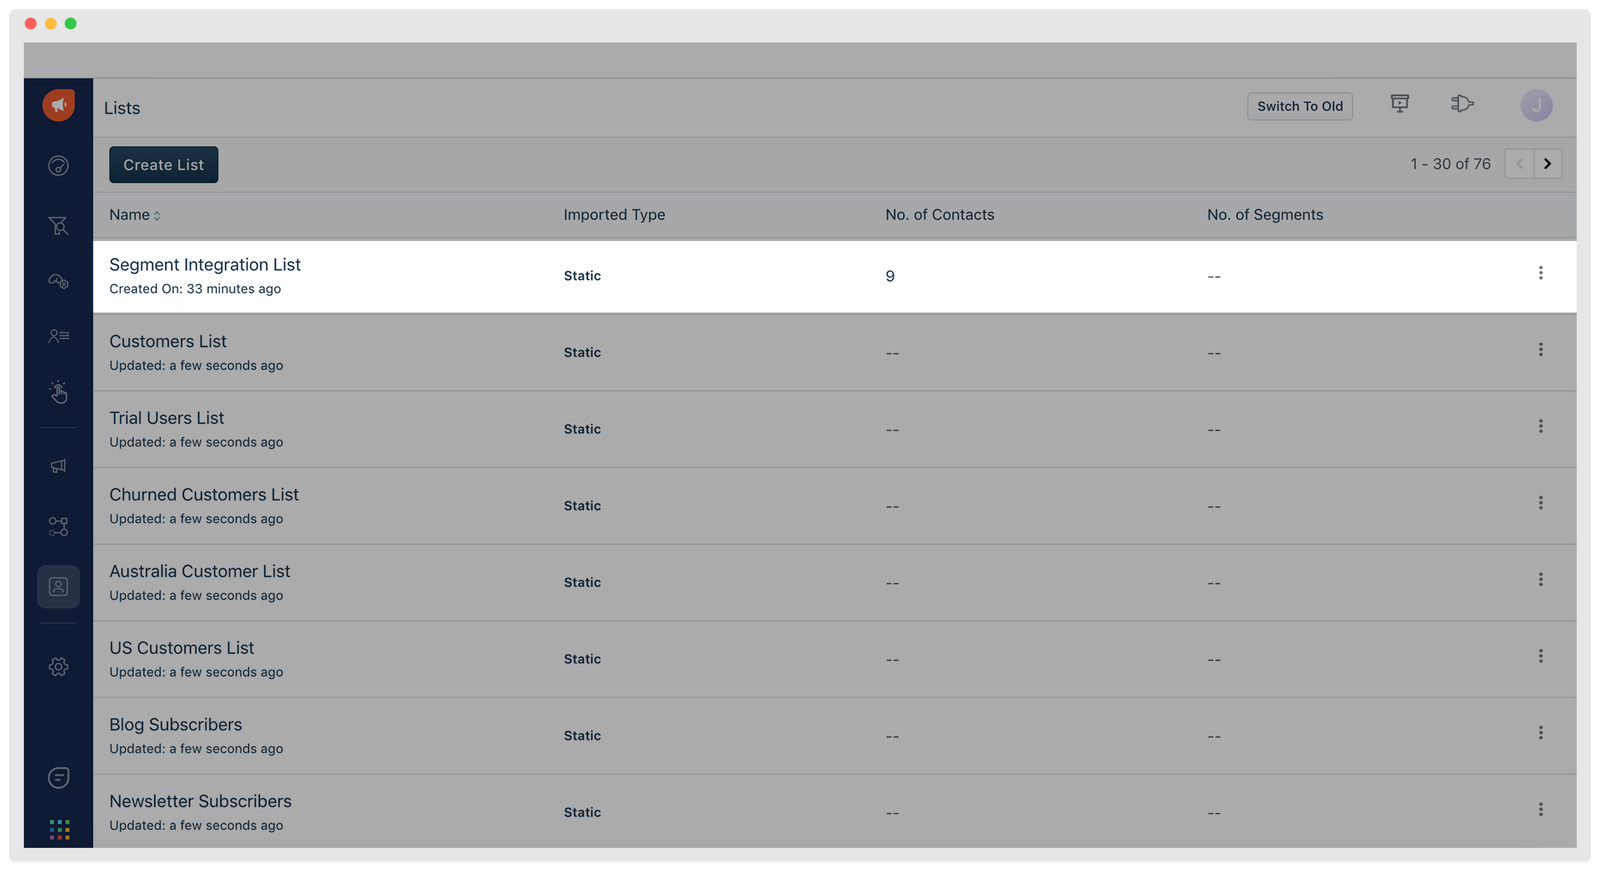
Here, we’re creating an audience of visitors who’ve triggered our Newsletter Apply event within the last 14 days. We’re also including anonymous visitors who haven’t yet signed up for an account with us.

heatmaps 1
Personas audience that shows that someone has applied to the newsletter in the last 14 days

Now let’s look at a more complex example. Below, we’re segmenting on users who’ve viewed one of our products within the last 7 days, but failed to purchase a particular product (product_id.)

heatmaps 2
More complicated Personas audience involving product views and orders completed

There are many other powerful options, so let’s briefly cover a final few:

3. Segmenting by campaign/point of origin. If you have two ad campaigns running (e.g. one for prospecting new users and one for retargeting past users), you can segment on that. 4. Segmenting by custom traits. Using Segment’s Identify function, you can segment on user details you collect from them within your app. See some examples below.

heatmaps 3
sample of data you can collect with Segment

Step 3: Populate a heatmap tool with data

If you haven’t already set up a third-party heatmap tool, start here. That page shares a list of quality heatmap tools that work out-of-the-box with Segment. Plus, you’ll get quick setup instructions.

The recipe that follows uses Freshmarketer as our heatmap tool.

heatmaps 4
Sample heatmap

First, add your heatmap tool to Segment

There are just a few simple setup steps:

First, make sure Freshmarketer supports the Connection Source type and Connection mode you’re using within Segment. (If you’re unfamiliar with these options, learn about connection modes here.

1. From your Segment UI’s Destinations page click Add Destination. 2. Search for “Freshmarketer” in the Destinations Catalog and confirm the Source you’d like to connect to.

heatmaps 5
Setting up Freshmarketer in Segment

3. Go to your Freshmarketer dashboard (Admin Settings > API Settings) and copy your API Key. 4. In the Freshmarketer settings in the Segment UI, paste your API Key.

Next, we complete our setup on Segment’s side.

Segment’s Identify function

If you’re using another heatmap tool that doesn’t work out-of-the-box with Segment, use Segment’s Identify function to capture visitor behavior into Segment. Here’s the documentation.

An example Identify call may look like:

Screenshot 2020-06-12 14.15.11

Once a user is identified, all their behavior and metadata is automatically sent to Segment. Segment then automatically redirects that data into to Freshmarketer (and any other tools you’ve set up within Segment).

Mapping visitor traits into Freshmarketer

Your incoming Segment data needs to be mapped onto the data Freshmarketer is looking for. You can quickly do this using Segment’s dashboard.

Within Segment, simply click into SettingsCustom fields on your Freshmarketer Destination.

heatmaps 6

Segment Personas

When mapping traits onto Freshmarketer, you can send the custom audiences (that we made earlier using Segment Personas' UI) as a user attribute. That’s how we create persona-segmented heatmaps automatically using Segment.

(To learn a lot more about Personas, you can reach out to us for a demo.)

Step 4: Set up your heatmaps in Freshmarketer

Once you’ve connected Segment to Freshmarketer, you can send the audiences you’ve created through Segment Personas to Freshmarketer as a user property.

If you’re just setting up Freshmarketer for the first time, you’ll need to install Freshmarketer’s snippet to your website. See instructions here.

You can easily view all the contacts pushed to Freshmarketer under the Segment Integration List, after you click Contacts:

heatmaps 7

Next, you’ll create a segment based on that list. To do this, go to ContactsSegments, click Create Segment and name it, then select Lists and select your imported list from Segment.

heatmaps 8

Later, once you’ve collected data from a few site or app visitors, you’ll see your segmented heatmaps in your Freshmarketer dashboard:

  1. Click Heatmaps (under the Conversion Rate Optimization tab on the lefthand menu)

  2. Click View Heatmap and heatmaps will launch

  3. Next to Segment, click All Visitors and select the list you’ve just added as a Segment

heatmaps 9

Growth advice for running heatmaps

  • Just because your website converts well on desktop, its performance may not translate to mobile. Don’t forget to assess heatmaps across major device types, each of which comes with its own UX idiosyncrasies.

  • Heatmaps are most commonly used for learning what works on a page. But they can be equally informative for researching what distracts users from your core content. For example, if users spend a lot of time looking and clicking in a low-value part of your page that doesn’t help them convert, maybe remove that part of the page.

  • Combine A/B tests with heatmaps to identify which version of each landing page engages users the most. For example, maybe one landing page variant gets people to spend 50% more time on-page — or click 100% more in a particular part of your page that’s important for conversion.

  • By studying scroll-depth heatmaps, you can also identify where on your page users naturally gravitate. You can use this data to re-order the sections of your page to put the best content first. Keep iterating until your page is nothing but attention-grabbing content.

Wrapping up

Here’s what we’ve done in this growth recipe:

1. We setup our third-party heatmap tool. 2. We created Segment Personas to categorize traffic into unique personas that behave differently and therefore deserve to be treated differently. 3. We used Segment’s automatic integrations to connect it all together.

Here’s what we recommend keeping in mind: The more thoughtful you are about audience segmentation — identifying the behavioral divides between visitors — the better you’ll convert them. The benefits of this go far beyond heatmaps and extend into landing page customization, custom coupons, surfacing the most appropriate products to users, and more.

Try this recipe for yourself...

Get help implementing this use case by talking with a Segment Team member or by signing up for a free Segment workspace here.

The State of Personalization 2023

Our annual look at how attitudes, preferences, and experiences with personalization have evolved over the past year.

Get the report
SOP 2023

The State of Personalization 2023

Our annual look at how attitudes, preferences, and experiences with personalization have evolved over the past year.

Get the report
SOP 2023

Share article

Want to keep updated on Segment launches, events, and updates?

We’ll share a copy of this guide and send you content and updates about Twilio Segment’s products as we continue to build the world’s leading CDP. We use your information according to our privacy policy. You can update your preferences at any time.